AWS NVIDIA GPU Instance Setup (for UK)
Creating an Amazon SageMaker notebook instance of type ml.g4dn.xlarge for Deep Learning in the EU London (eu-west-2) region.


- 1. Prelimiary Points
- 2. AWS Account & Service Quota Increase
- 3. CloudFormation
- 4. Sagemaker Instance

1. Prelimiary Points
1.1 Why do I need an NVIDIA GPU?
I'm completeing the Deep Learning for Coders with fastai & PyTorch course by Jeremy Howard and Sylvain Gugger which; by the way, is amazing and very alturistic of them (thanks both!). To actually do the course I need access to a GPU. Now, I'm in no way an expert on software engineering but through reading the course book it says that the tasks handled by a GPU are very similar to those done by a neural network. Therefore, for this course, computing over a GPU is superior to that of a CPU. In addition, not any old GPU will be supported by the main deep learning libraries therefore I need access to an NVIDIA GPU.
1.2 Why am I using AWS?
I've decided to complete this course using Amazon Sagemaker notebook instances. The reason for this is because I already use AWS at work but mainly as a cloud storage platform (s3 buckets). I'd like to see what other wizardry it houses.
1.3 Alternative Guides
There are a couple of guides on how to get set-up with Amazon Sagemaker as well as other servers such as Paperspace Gradient and Google Colab. However, I've found that some of the steps are different for people living in the UK so I thought I'd create this slightly alternative guide. I'm also very new to remote server usage and deep learing so I thought I'd create a more incremental guide for the absolute beginners among us (I feel your pain).
2. AWS Account & Service Quota Increase
2.1 AWS Account
In order to use Amazon Sagemarker you need an AWS account. This is really simple to set-up, just follow Amazon's instructions in this post here. Note, you'll need your credit or debit card details to hand.
2.2 Service Quota Increase
When you create an AWS account you'll be assigned the default quotas (also referred to as 'limits') for a variety of services (images, instances etc.) based on your region (I'm based in the UK so my region is eu-west-2). These defaults might work for you or you may want to go up a notch with them. As I said at the start, for the Fastai course I need a specific GPU and so I need to request a 'limit increase'.
Now as I've said, I'm no software engineer and I had a bit of a hard time following the quides at this point. According to the steps, I needed to request a 'ml.p2.xlarge' instance however this isn't currently available in my region. I then went in search of the next best thing and found this wonderful article which helped me decide on requesting a 'g4dn.xlarge' instance.
Note, the request can take a day or two for AWS support to process. So make sure you account for this if you're trying to stick to a schedule or deadline.
2.3 Steps for request
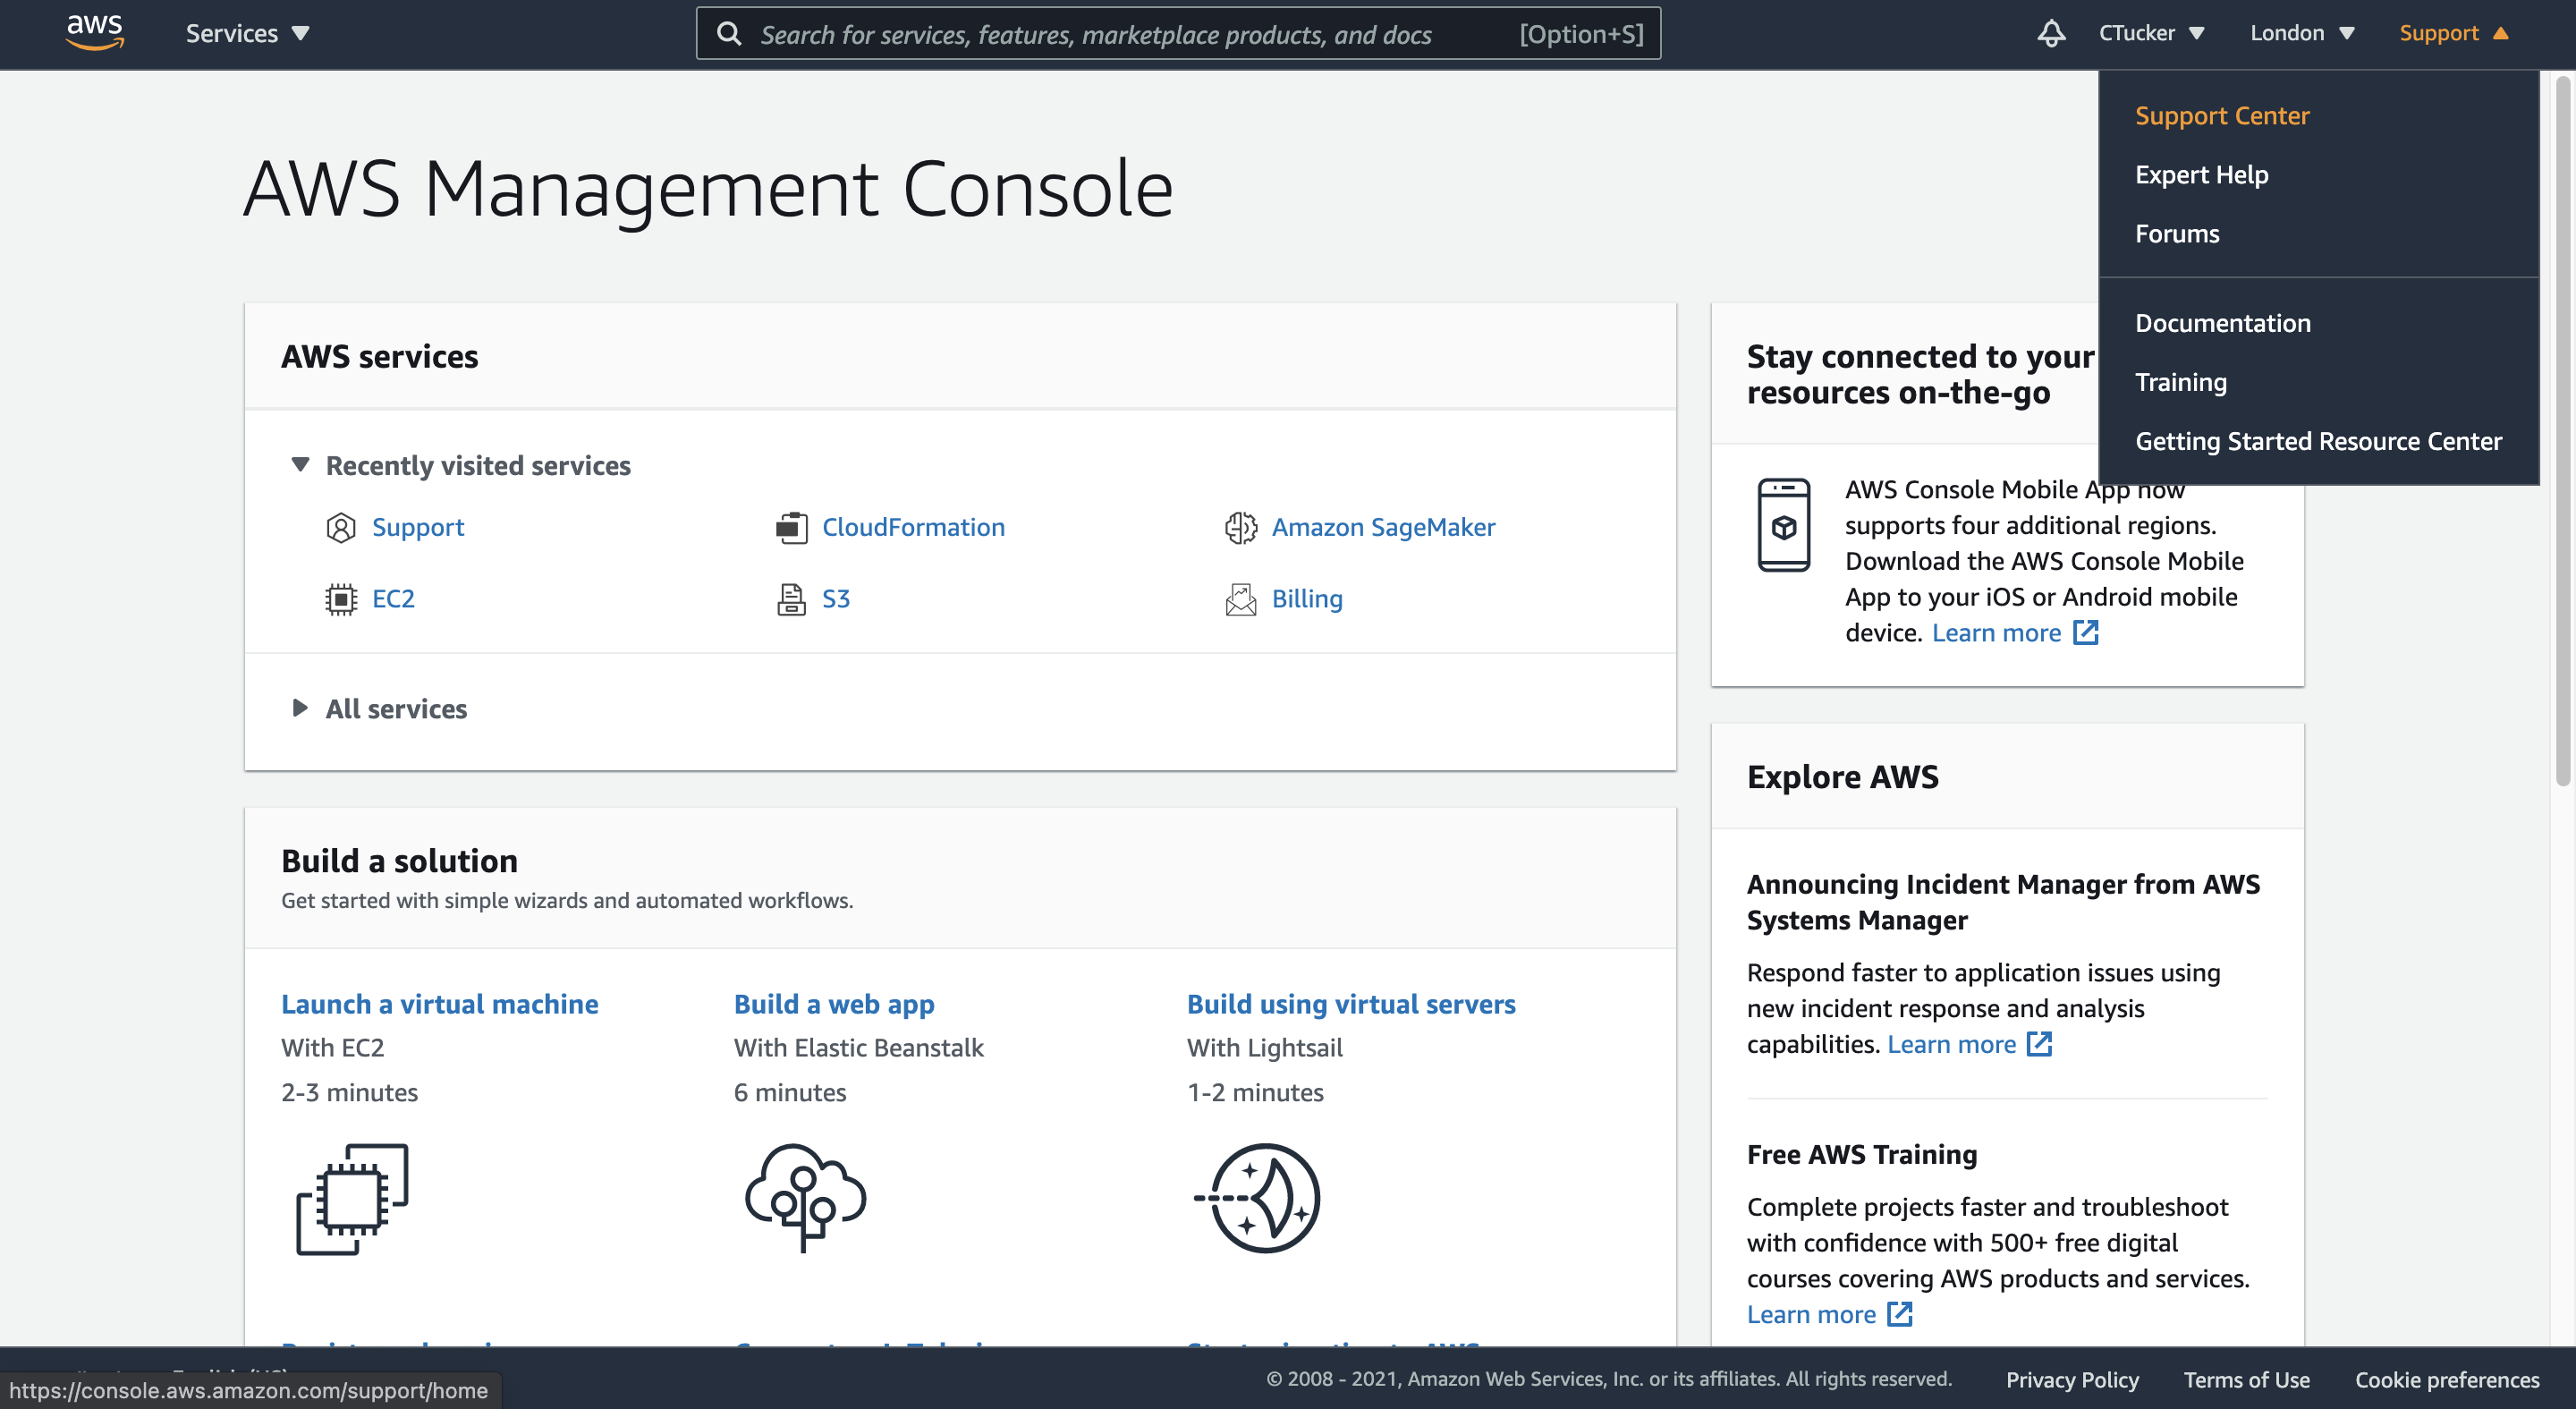
1 - On the AWS console home page find the 'Support' drop down located in the top right hand corner and select 'Support Center' from the list.
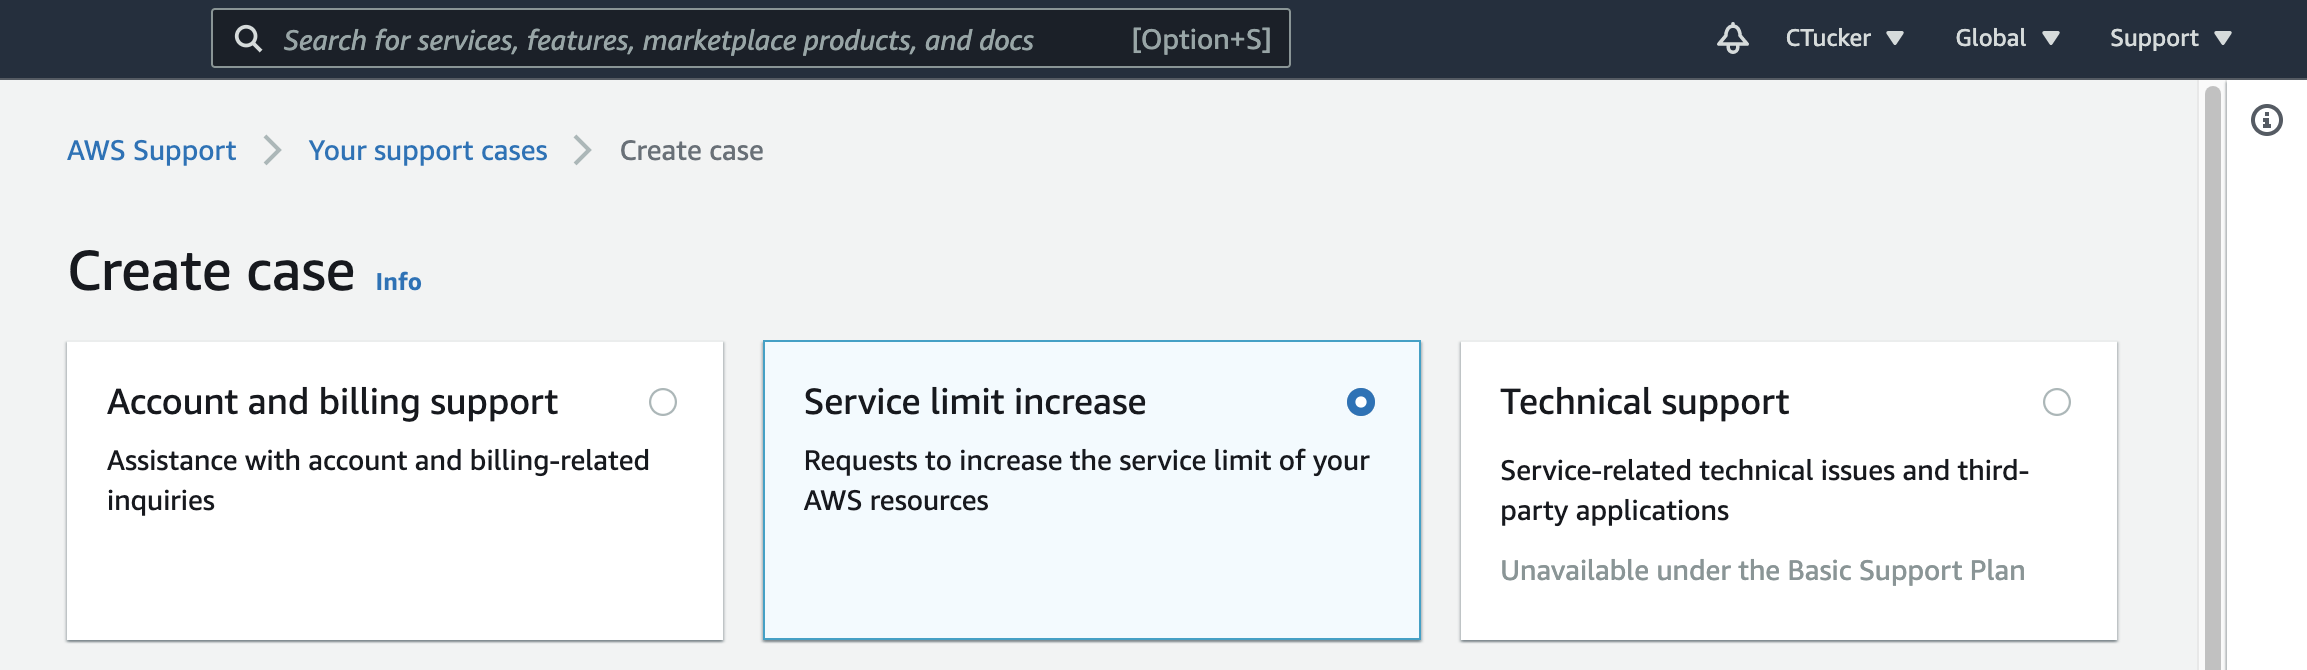
2 - On the support center home page select 'Create Case'.
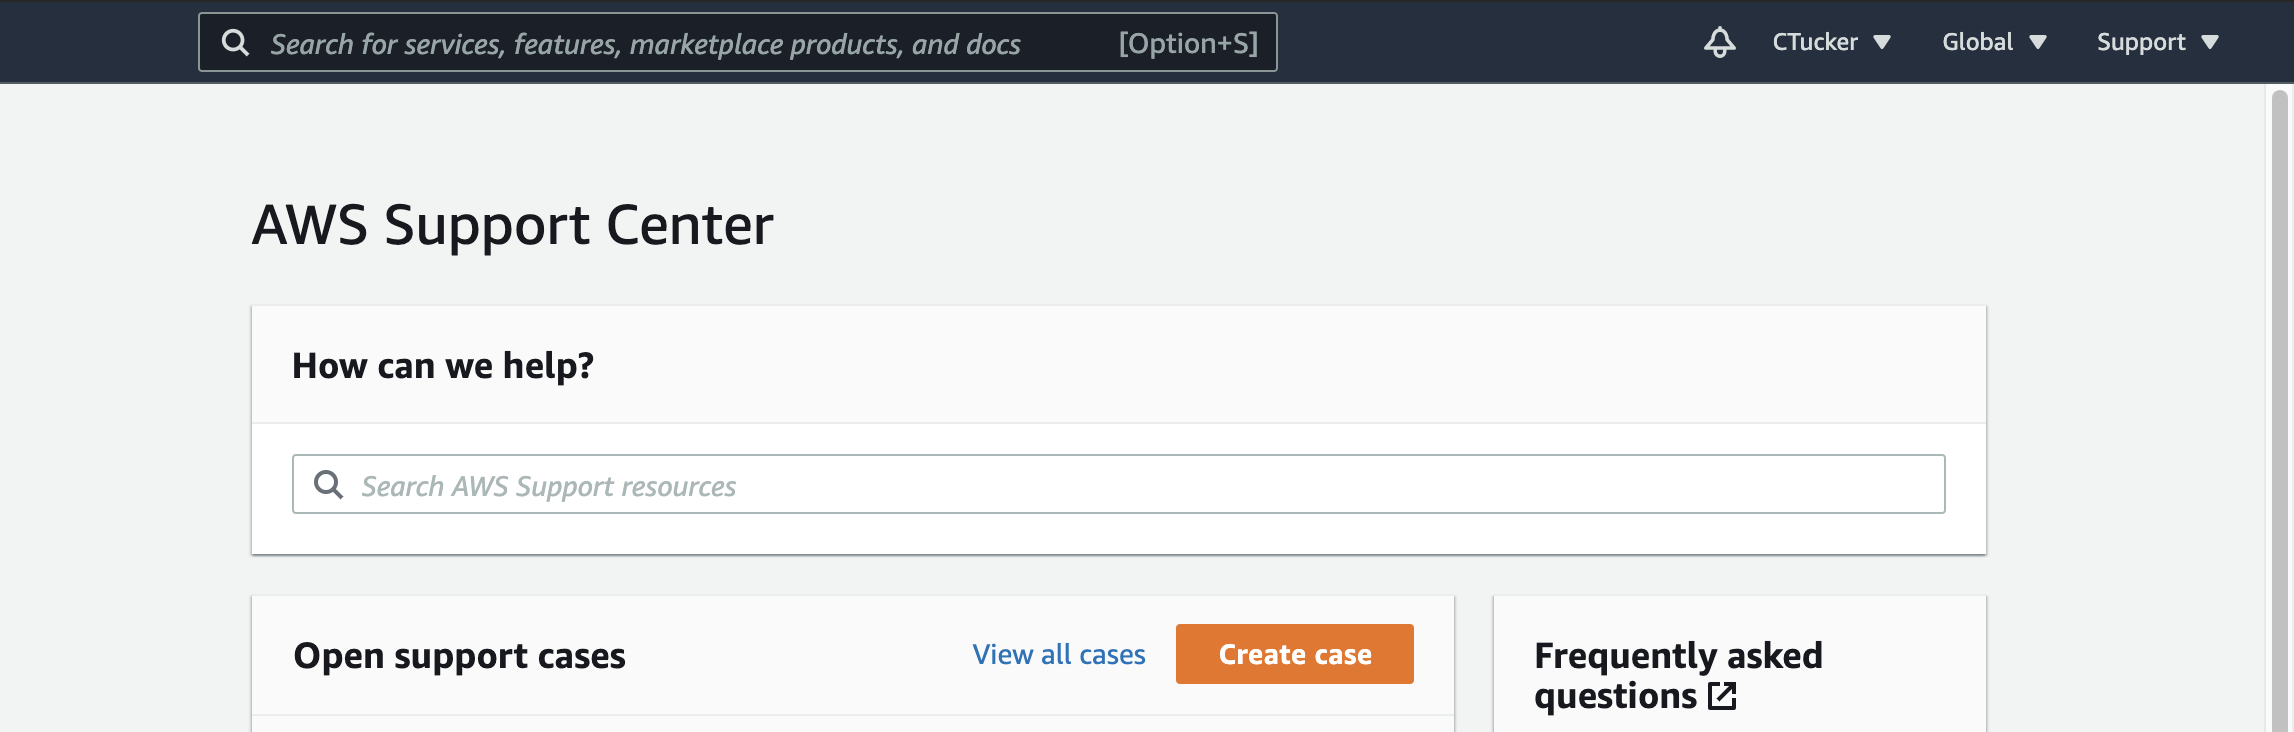
3 - Then select 'Service Limit Increase'. This will populate the lower part of the page.
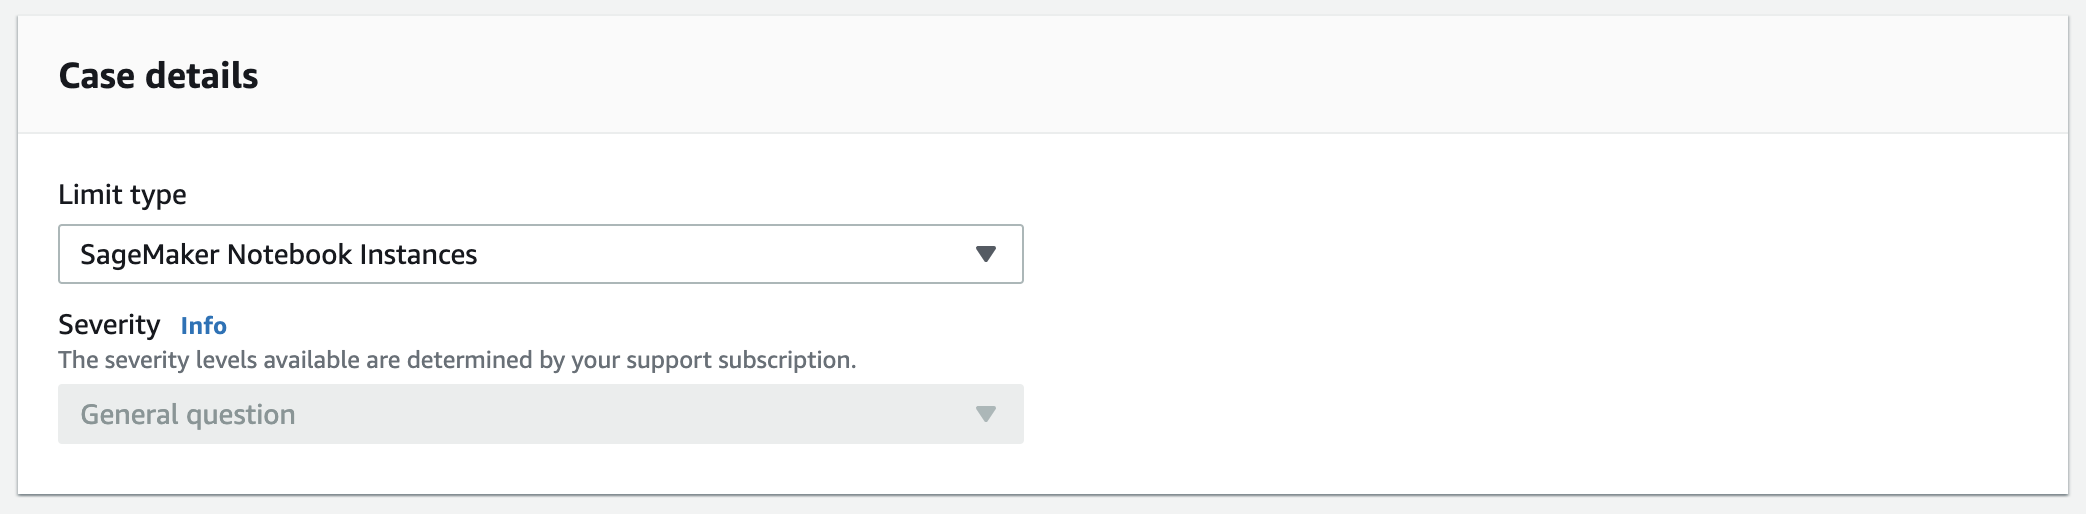
4 - In 'Limit type' select 'SageMaker Notebook Instances'.
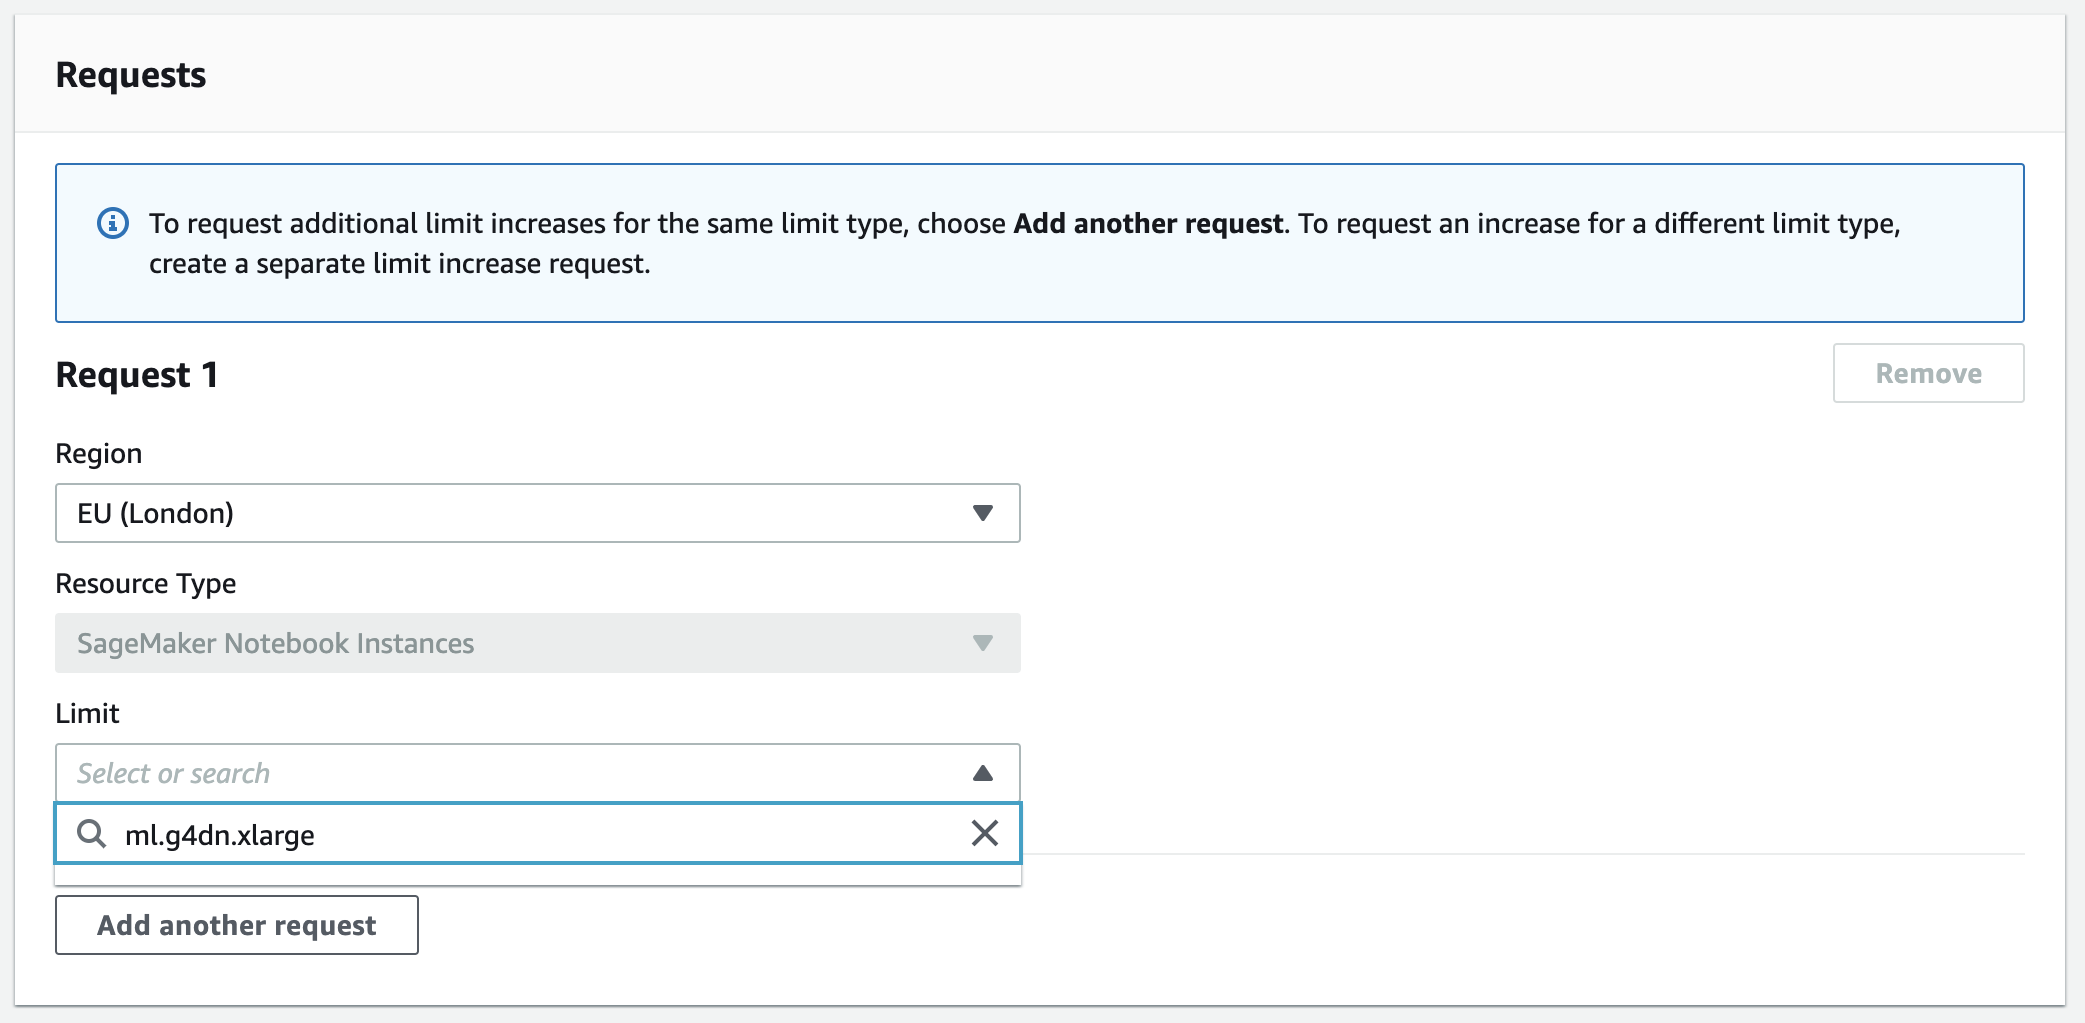
5 - Select the region (I chose 'EU (London)') and the Limit (I selected 'ml.g4dn.xlarge').
6 - Add a case description (I said I was completed thing Fastai course and needed an NVIDIA GPU at an affordable price).
7 - Press 'Submit'.
8 - A new case will be opened in the 'Support Center' and an AWS support will be in touch with you.
3. CloudFormation
3.1 CloudFormation
Once your service quota increase has been approved it's time to create a CloudFormation stack. I think of these stacks as your blueprint. It's a set of resources that you define and freeze at a point in time. It means that you can replicate a certain situation or environment again and again. Frequently when using Python or Conda packages there will be an update to one package which is incompatbile with another. This can result in a script being fine one day but failing the next day after a package update. It's really annoying. Having an environment that is frozen in time means that your code can run without fail well into the future. I'm sure the advantage of using stacks isn't limited to just this but it's what stood out to me.
3.2 Stack Templates
A series of stack templates are provided on the Fastai site however; as I've stated before, these are set-up with an instance type of 'ml.p2.xlarge' which isn't available in the EU London (eu-west-2) region. Therefore, what I did was download the YAML file and edit it so that the instance choices include 'ml.g4dn.xlarge. I then saved this new YAML file to an S3 bucket of my own and created a stack based on that.
3.3 Stack Setup
1 - Download the Fastai EU London template using this link.
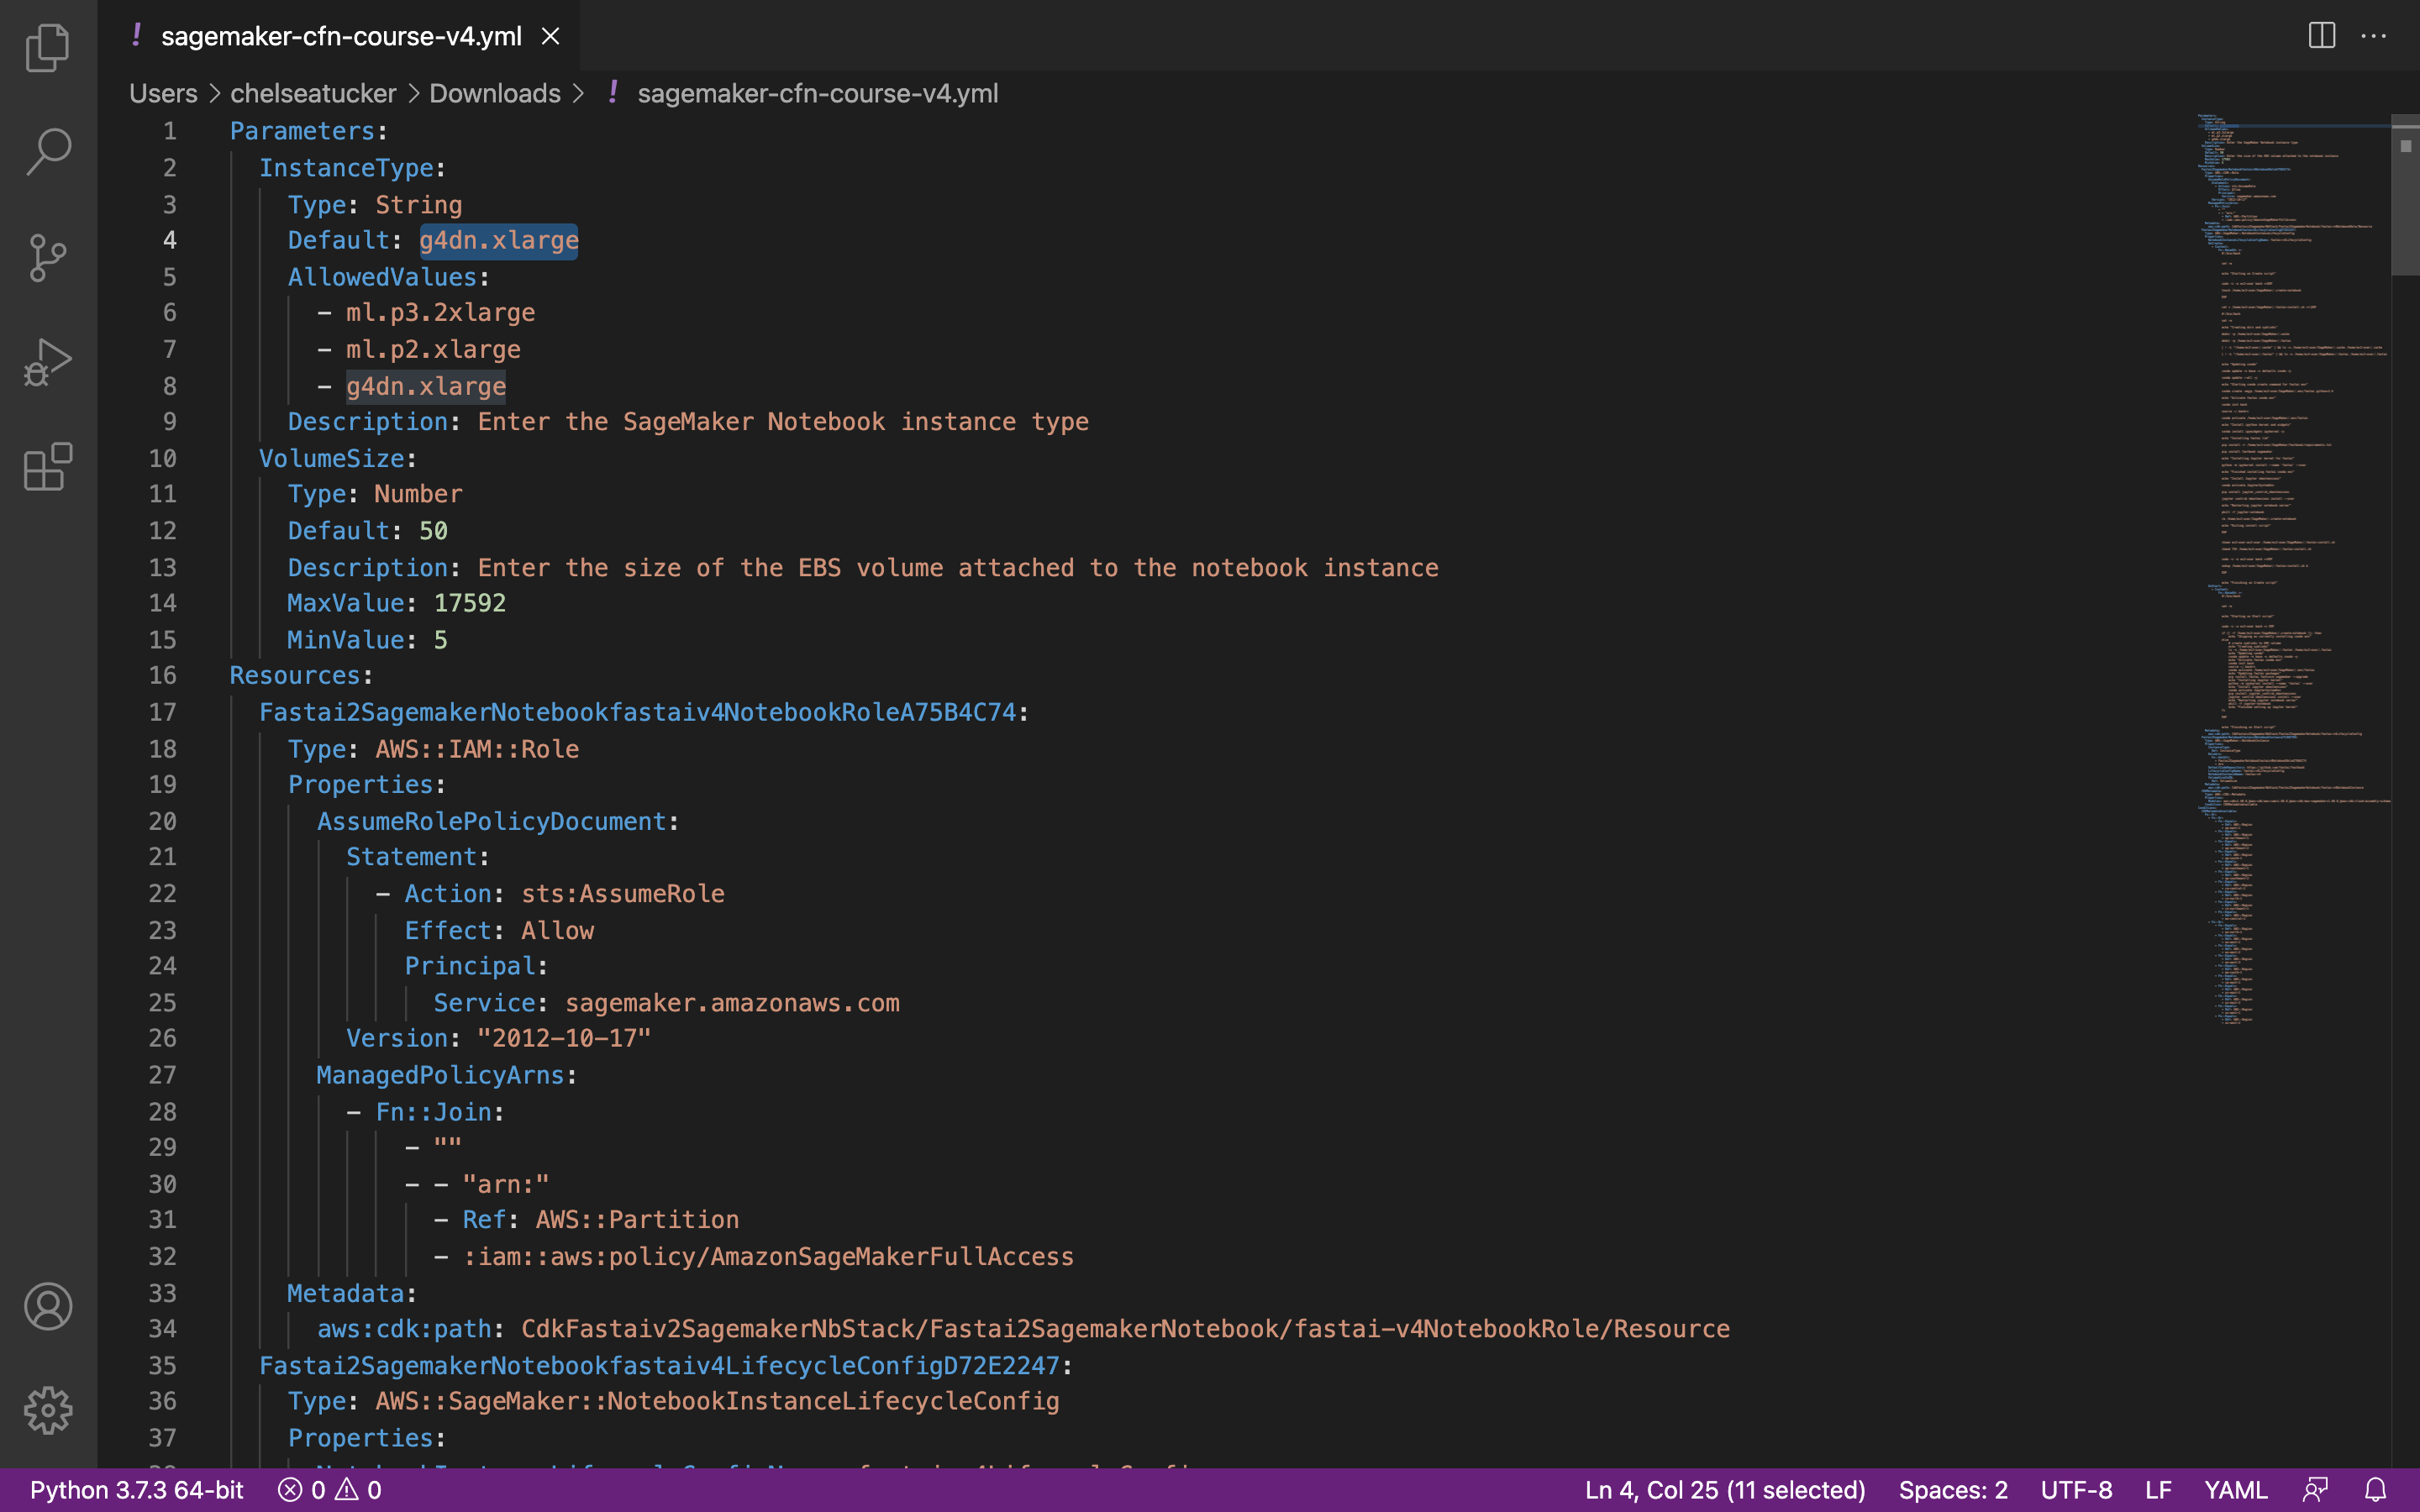
2 - Edit the default instance type to be 'ml.g4dn.xlarge' (line 4 below) and also add it as an allowed values (line 8). I did this edit in Visual Studio Code for ease and saved the edits over the original YAML file.
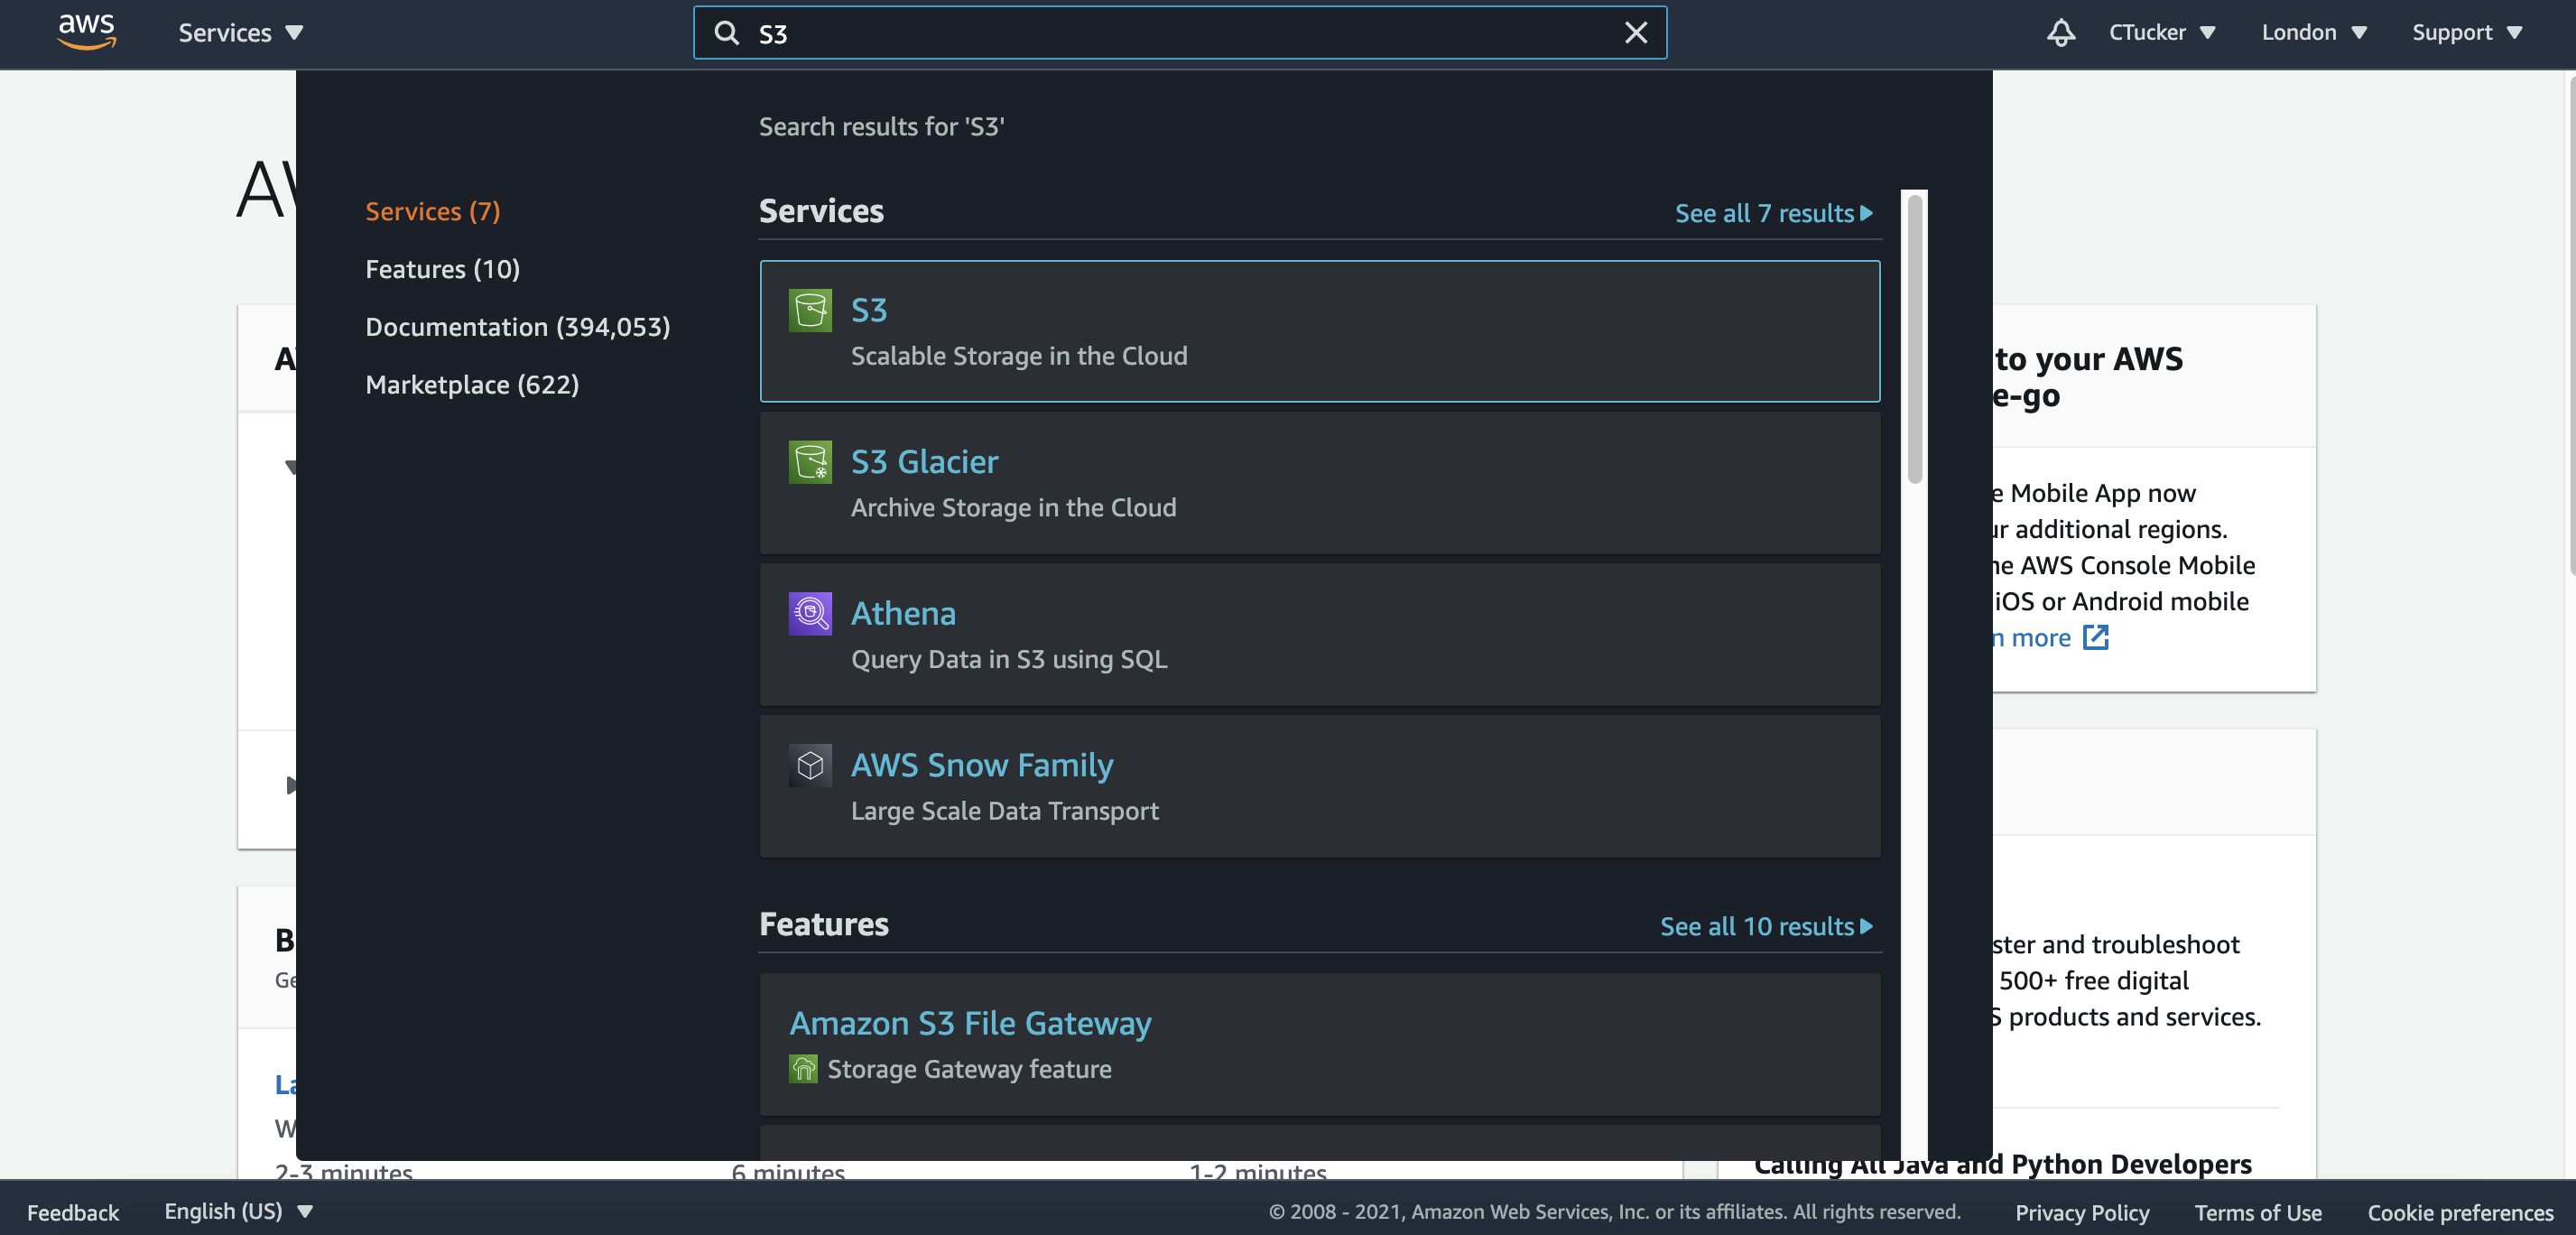
3 - Steps 3 to 6 guide you through uploading your YAML file to an S3 bucket so that your CloudFormation stack can access it as a stack template. This isn't necessary therefore if you're not interested in S3 buckets or knowing this bit then skip to step 7. Next thing to do is to upload this edited YAML file to an S3 bucket. To do this, return to your AWS management console page and in the search bar type 'S3' and select 'S3' from the drop down list.
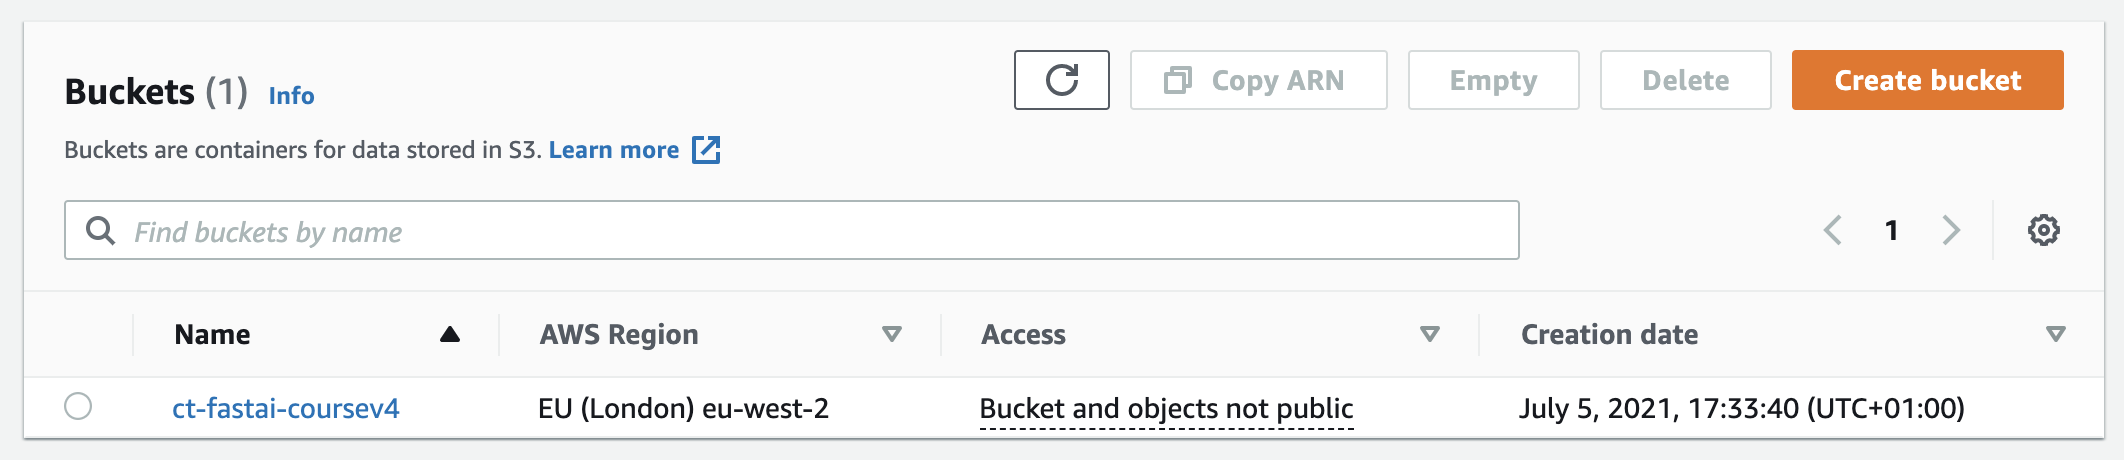
4 - In order to upload the YAML file to an S3 bucket, you need to create one. Just click the 'Create Bucket' button, give your bucket a name (I called mine 'ct-fastai-coursev4') and scrole down to 'Create Bucket'. You should see your S3 bucket in the list like mine below:
5 - Now, click on this new bucket and upload your YAML file. You'll do this by selecting 'Upload' and doing some drag and drop action with your YAML file. Once done your file should appear in the bucket.
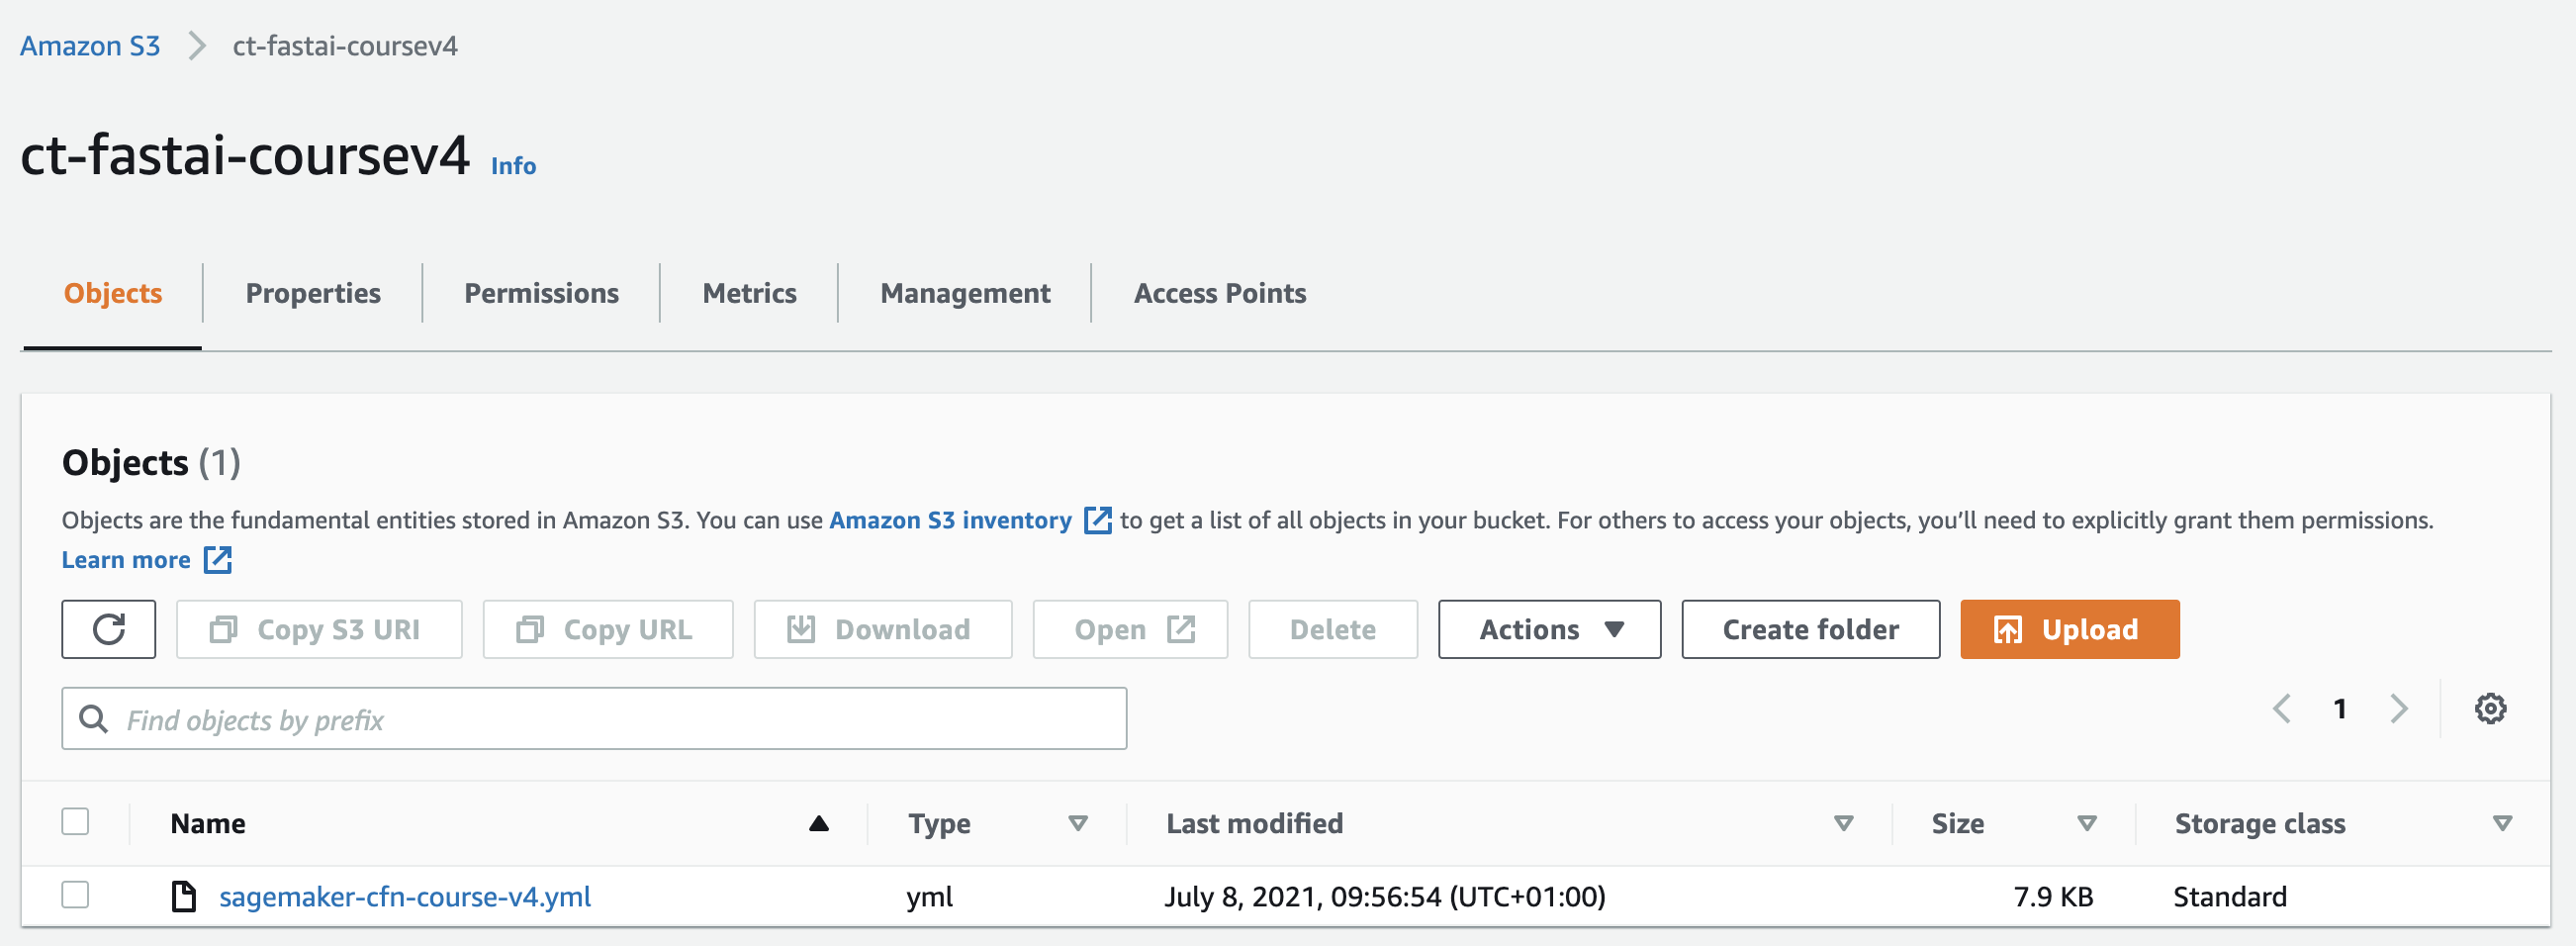
6 - Click on your YAML file that you've just uploaded and copy the objects URL. You'll need this when creating your CloudFoundation stack.
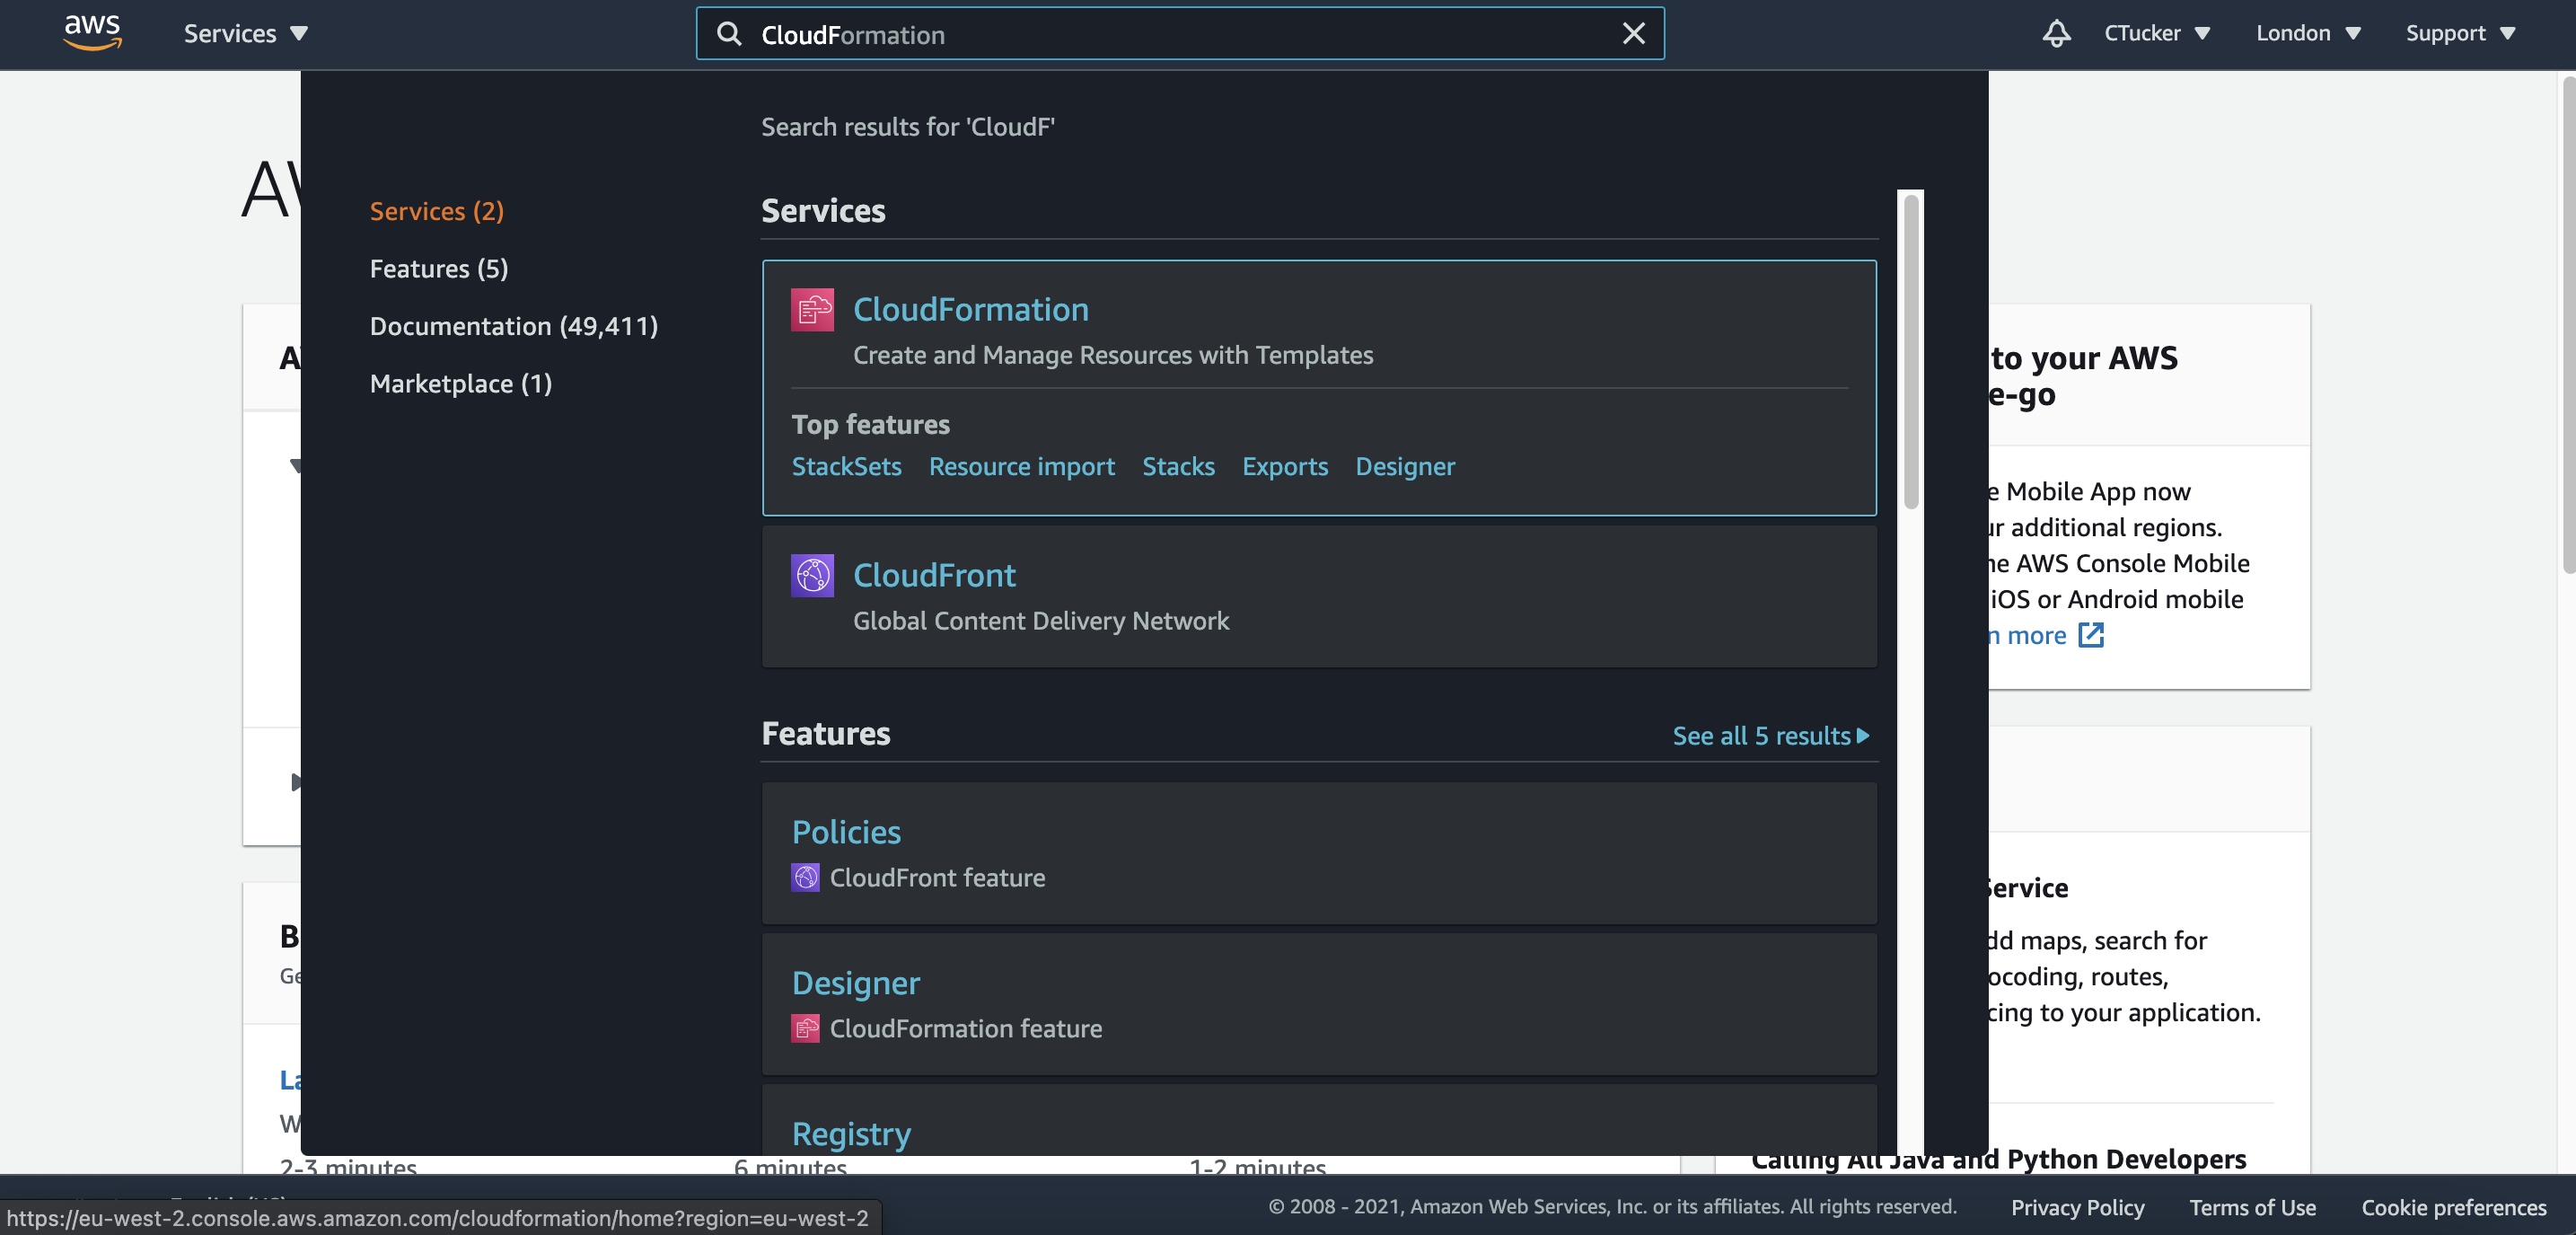
7 - Time to go back to the AWS management console page and in the search bar type 'CloudFormation' and select 'CloudFormation' from the drop down list.
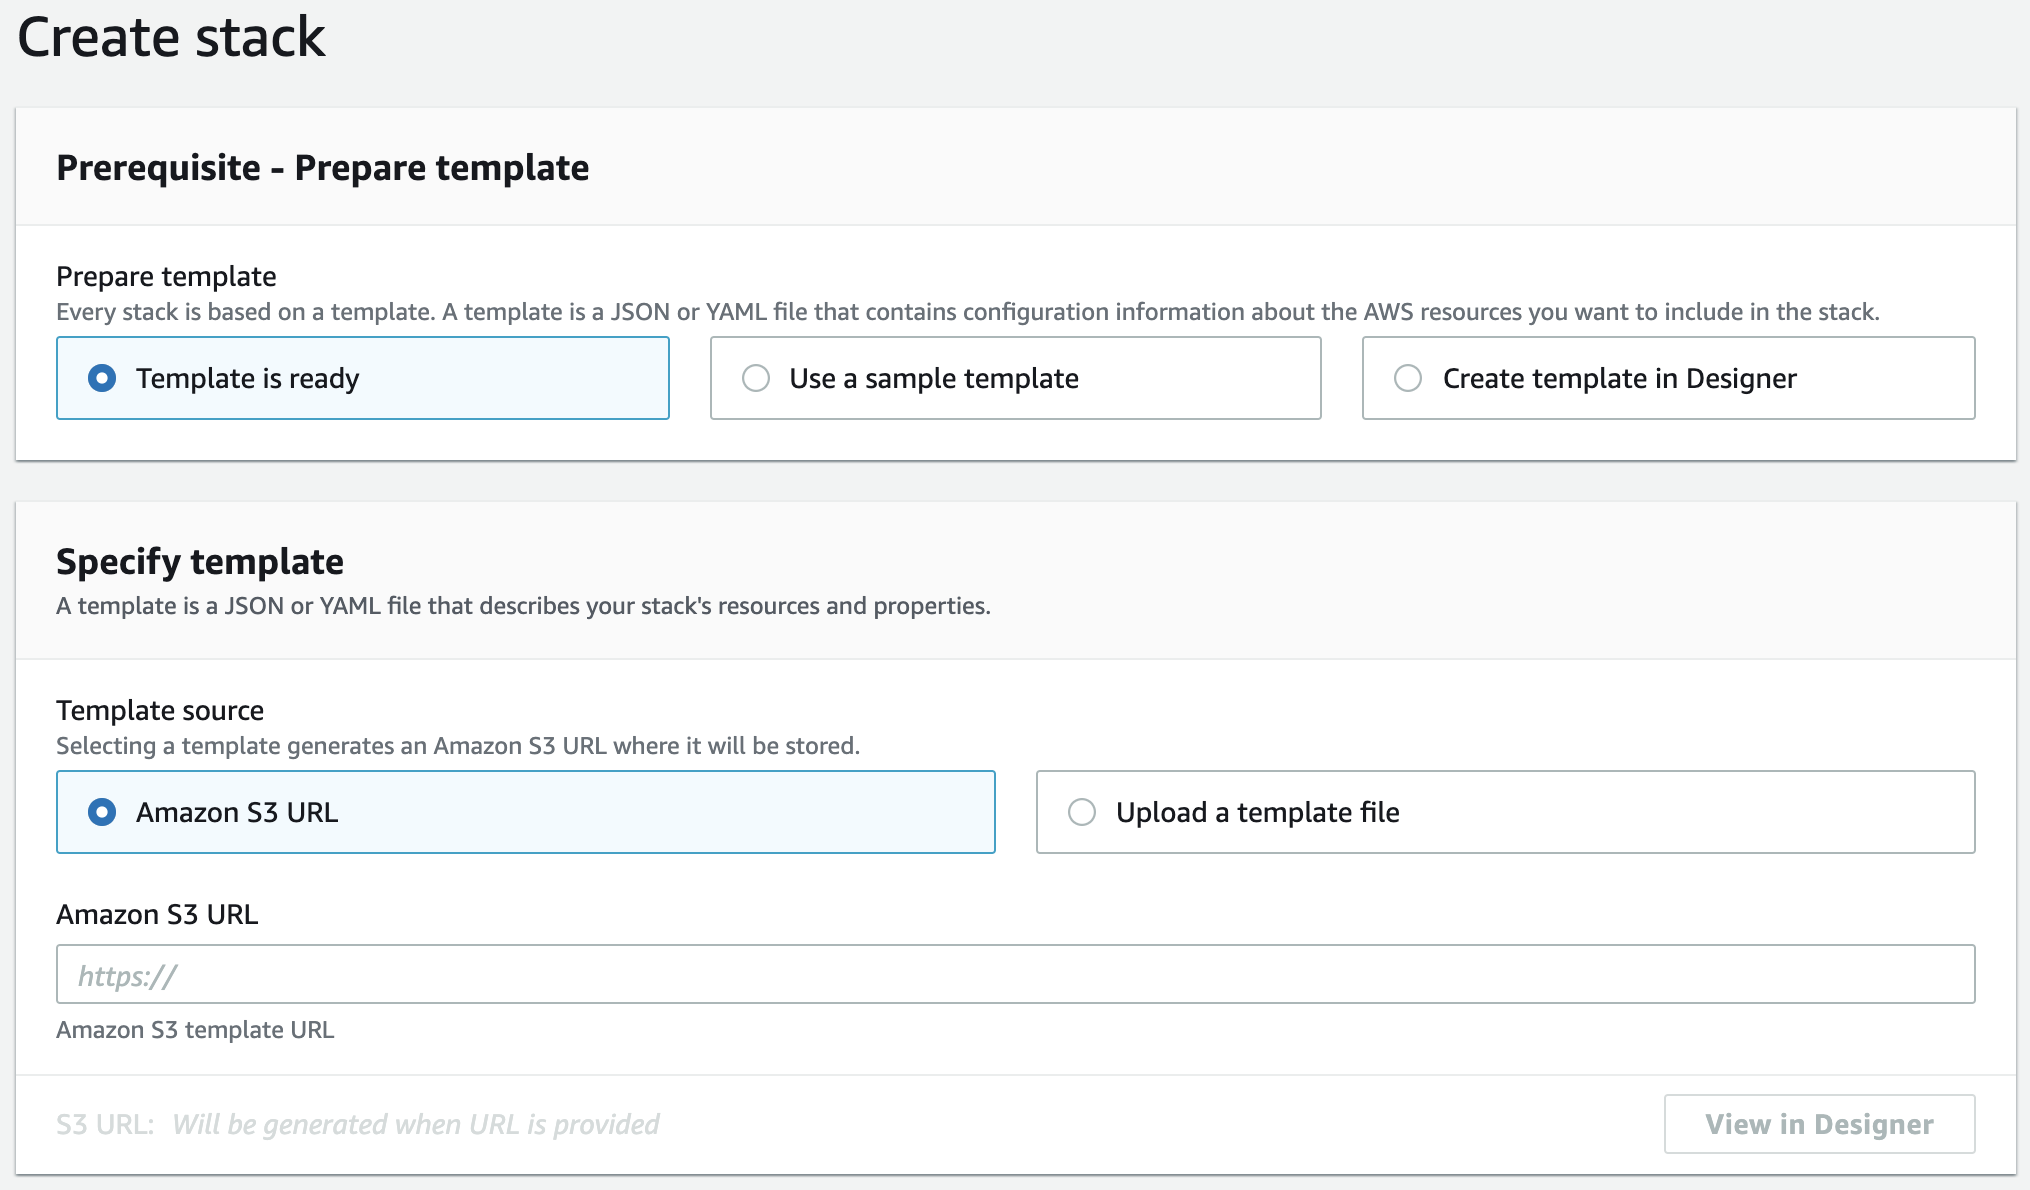
8 - Click the 'Create Stack' button. On the form select 'Template is ready'. If you're coming straight from step 3 then you should select your template source as 'Upload a template' and chose your edited YAML file from step 2. If you've gone through steps 3 to 6 then you can select your template source as 'Amazon S3 URL' and paste in the object URL from step 6.
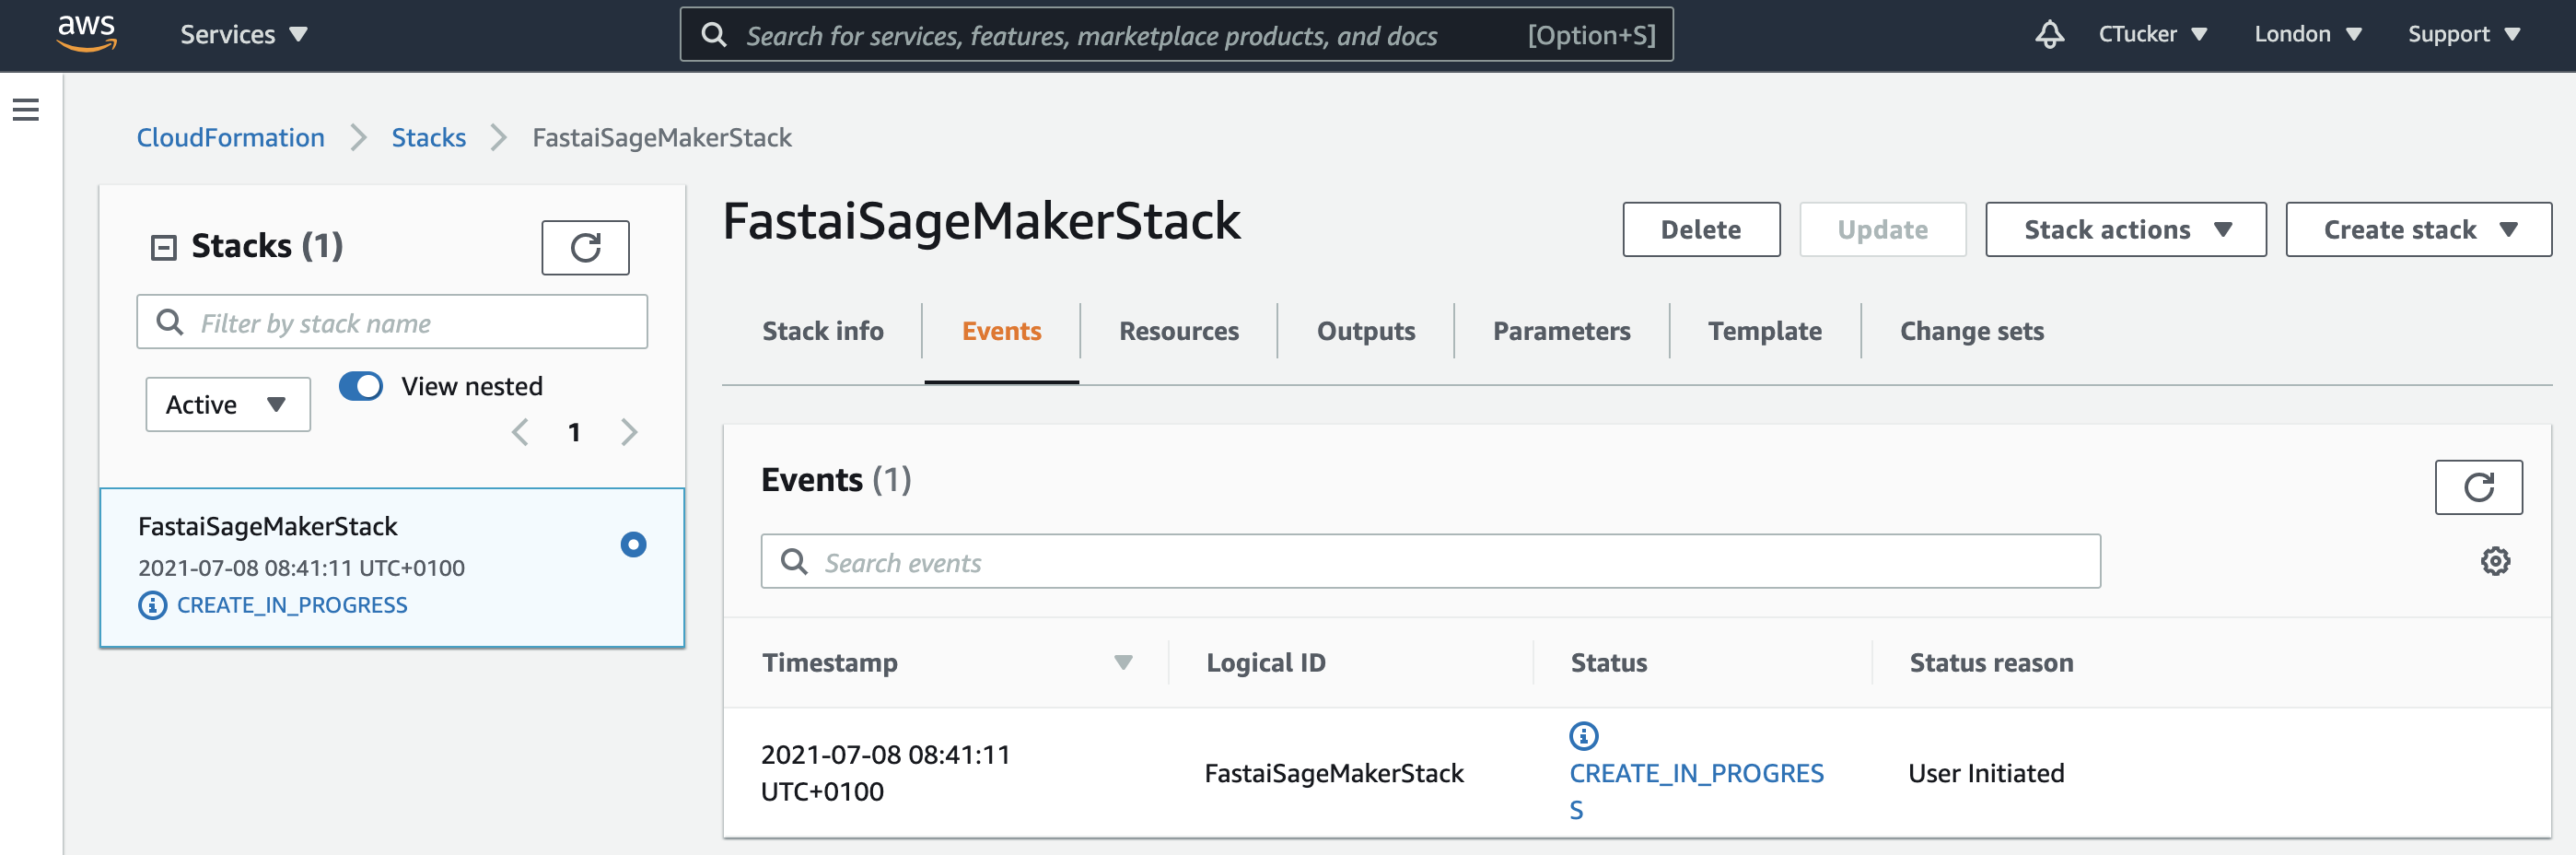
9 - Enter a stack name (I called it FastaiSageMakerStack) , the instance type as 'ml.g4dn.xlarge' and volume size as '50' and click 'Next'. I then clicked 'Next' for the following page without changing anything and created the stack. The below page should then appear which shows the stack being created.
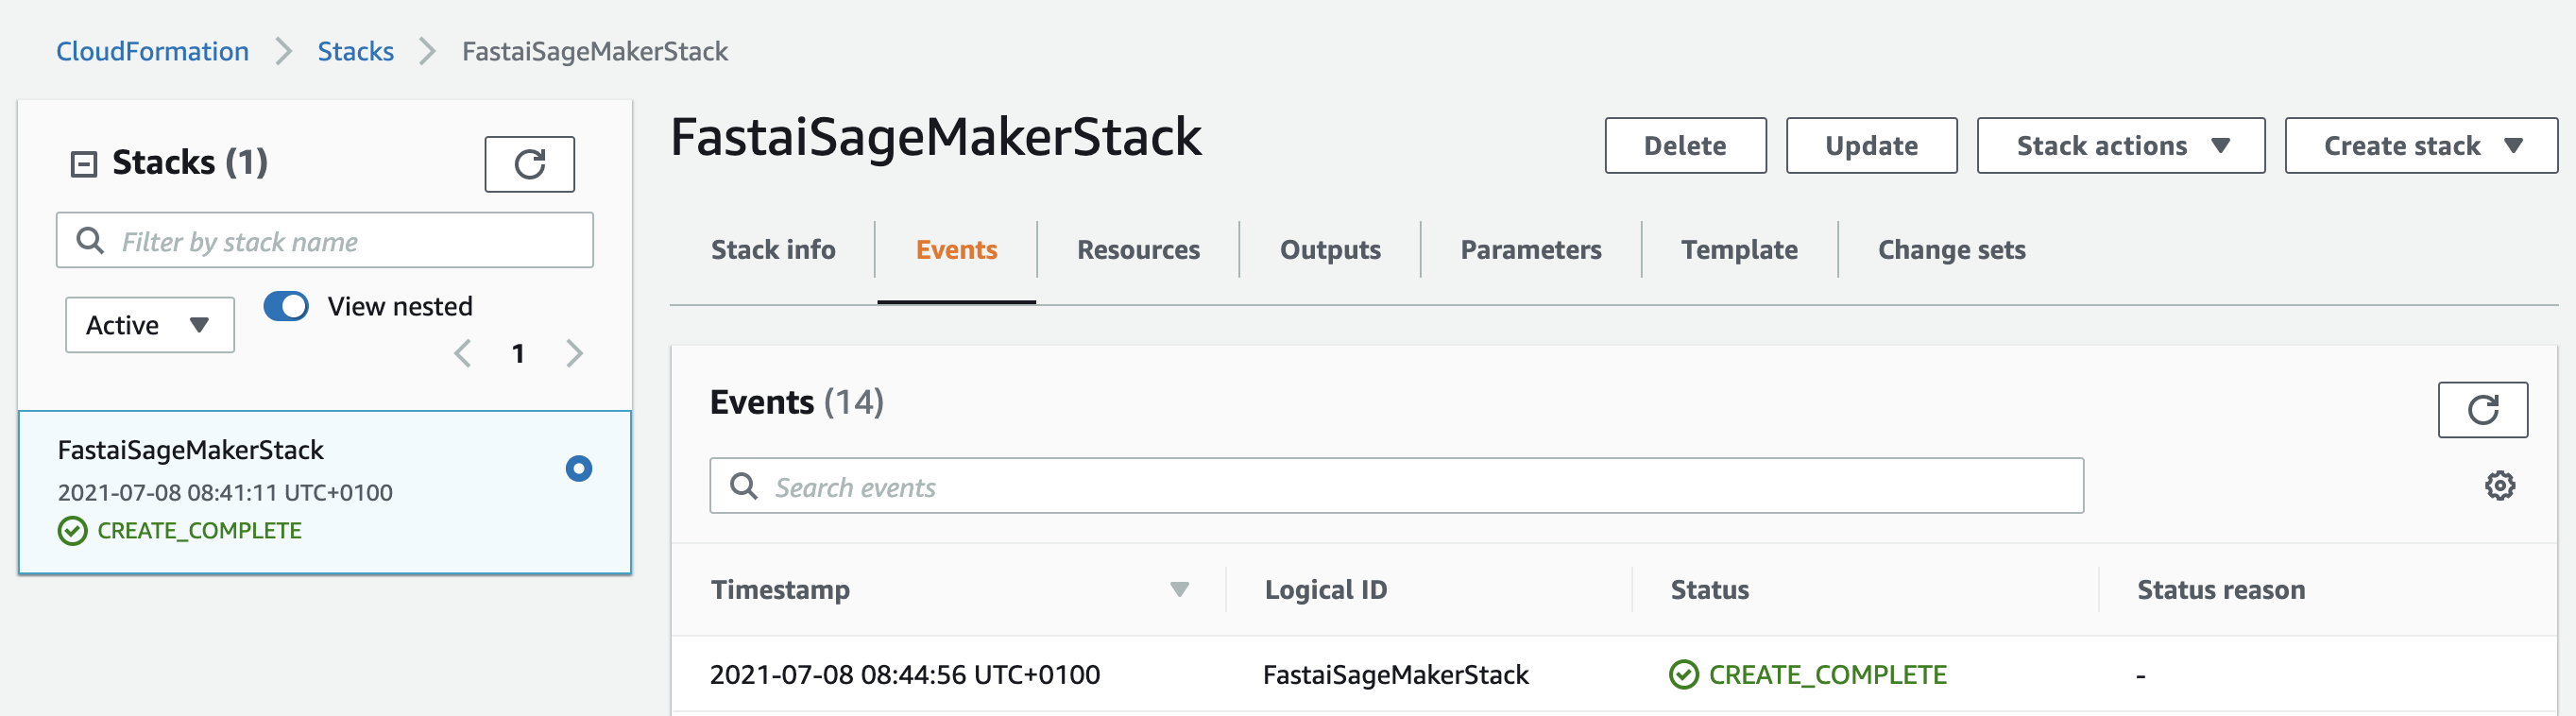
10 - Wait for the stack's status to change to 'CREATE_COMPLETE' before moving on.
4. Sagemaker Instance
4.1 Notebook Setup
1 - Go to the AWS Management Console page and type 'Sagemarker' in the search bar. Select 'Amazon SageMaker'.

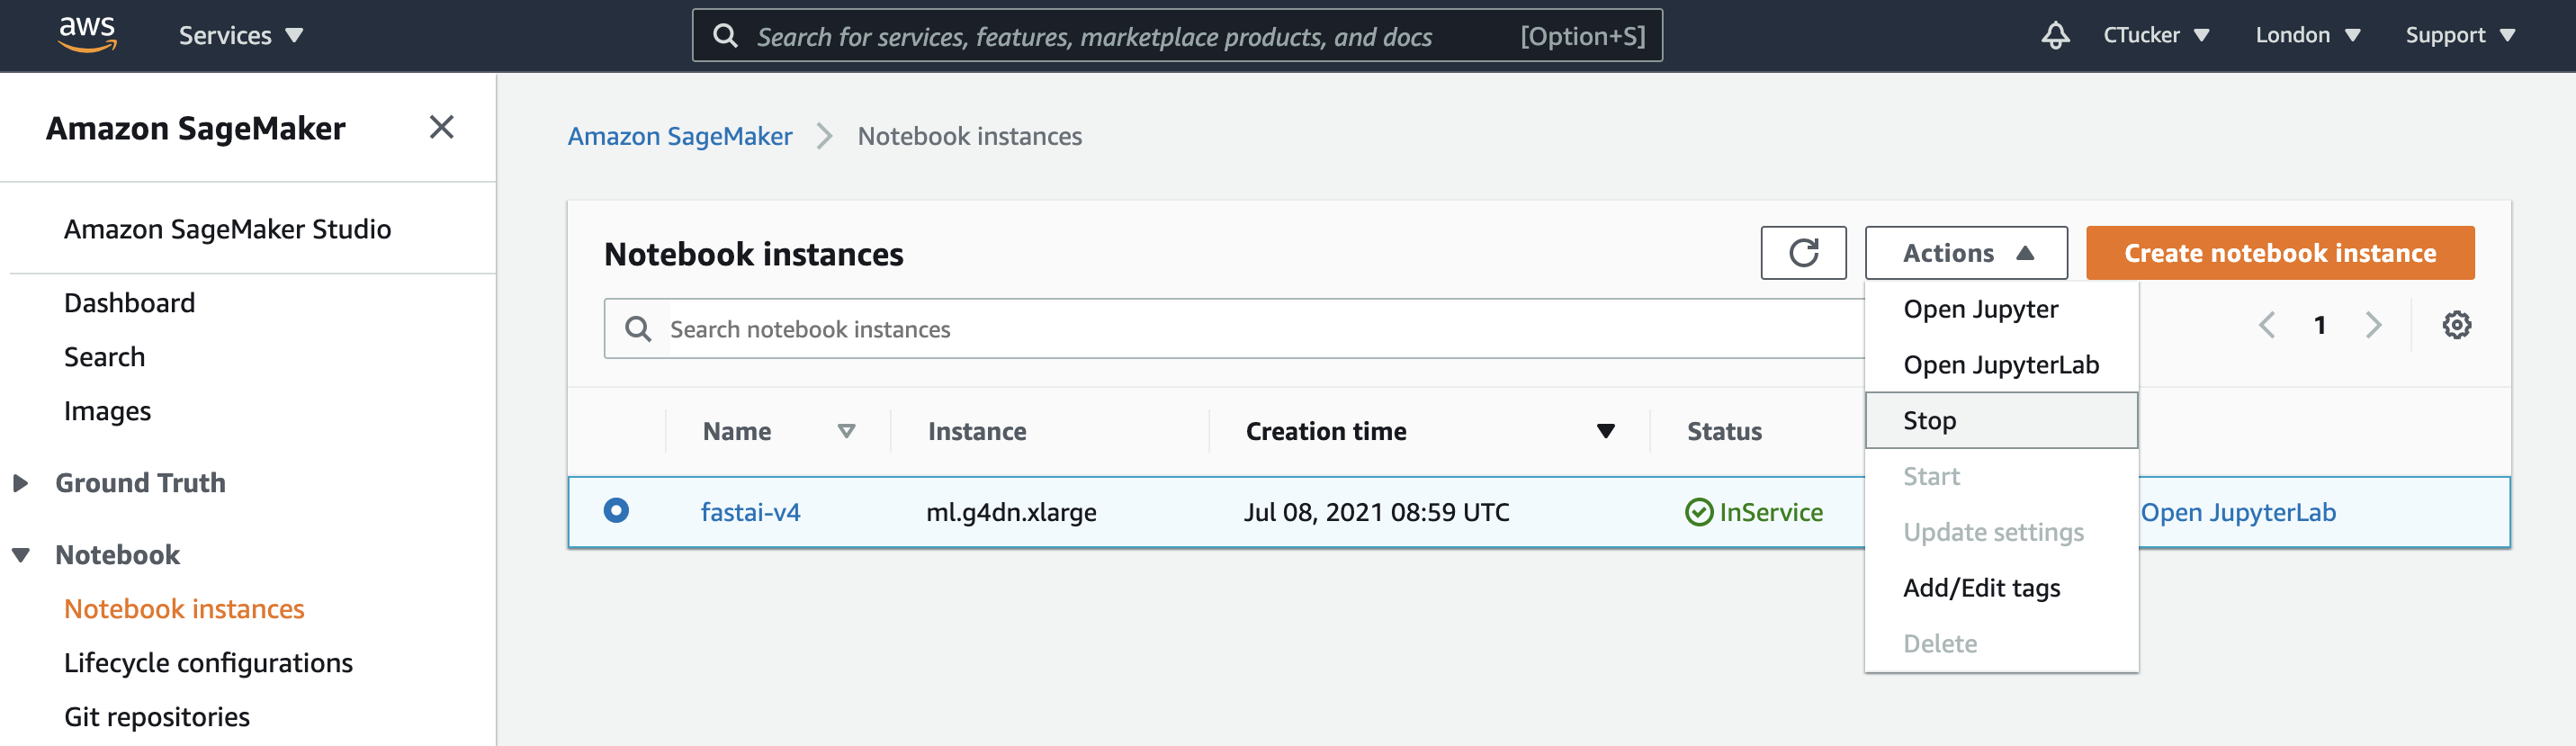
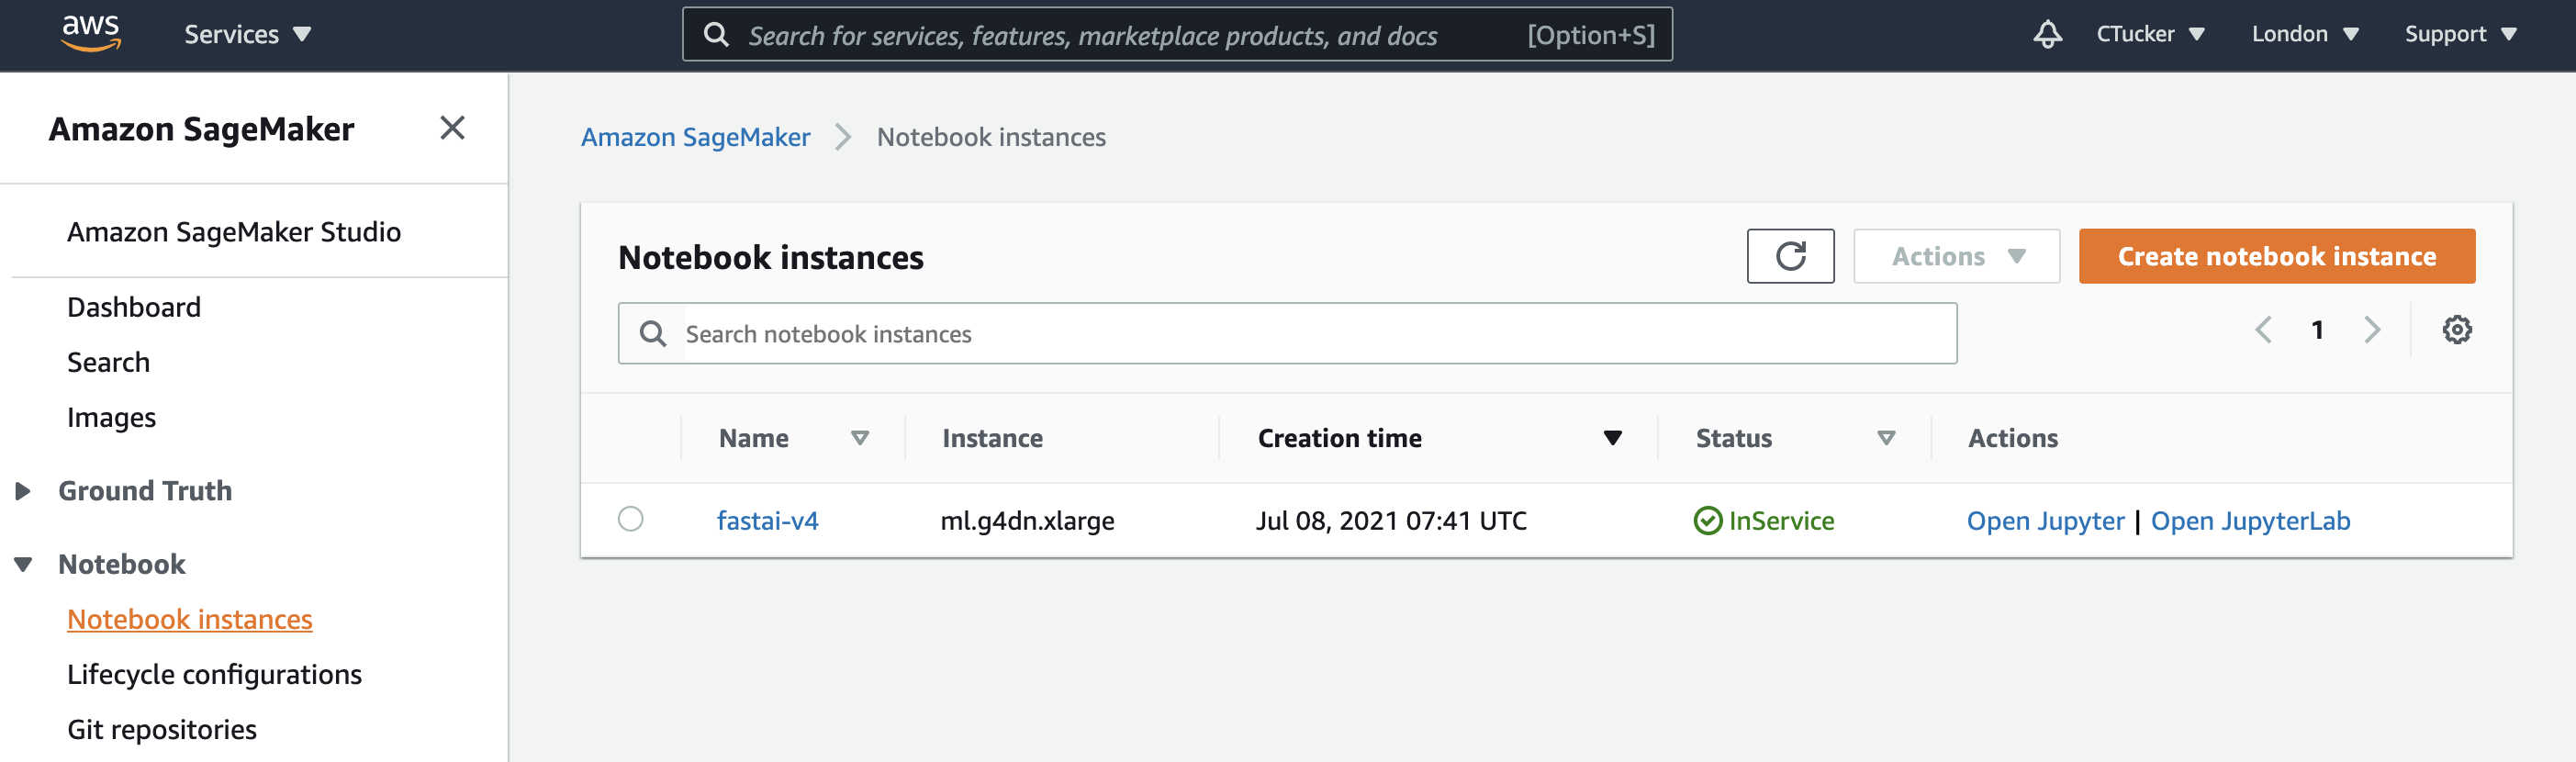
2 - On the right hand panel select 'Notebook' and then 'Notebook Instances'. A page should appear with your notebook instances, in the list should be the notebook 'fastai-v4' that was created from our CloudFormation stack (line 196 of the YAML file).
3 - Right click on the 'Open in Jupyter' option and select 'Open in new tab'. This should open the Jupyter web interface and all of the material for the Fastai course.

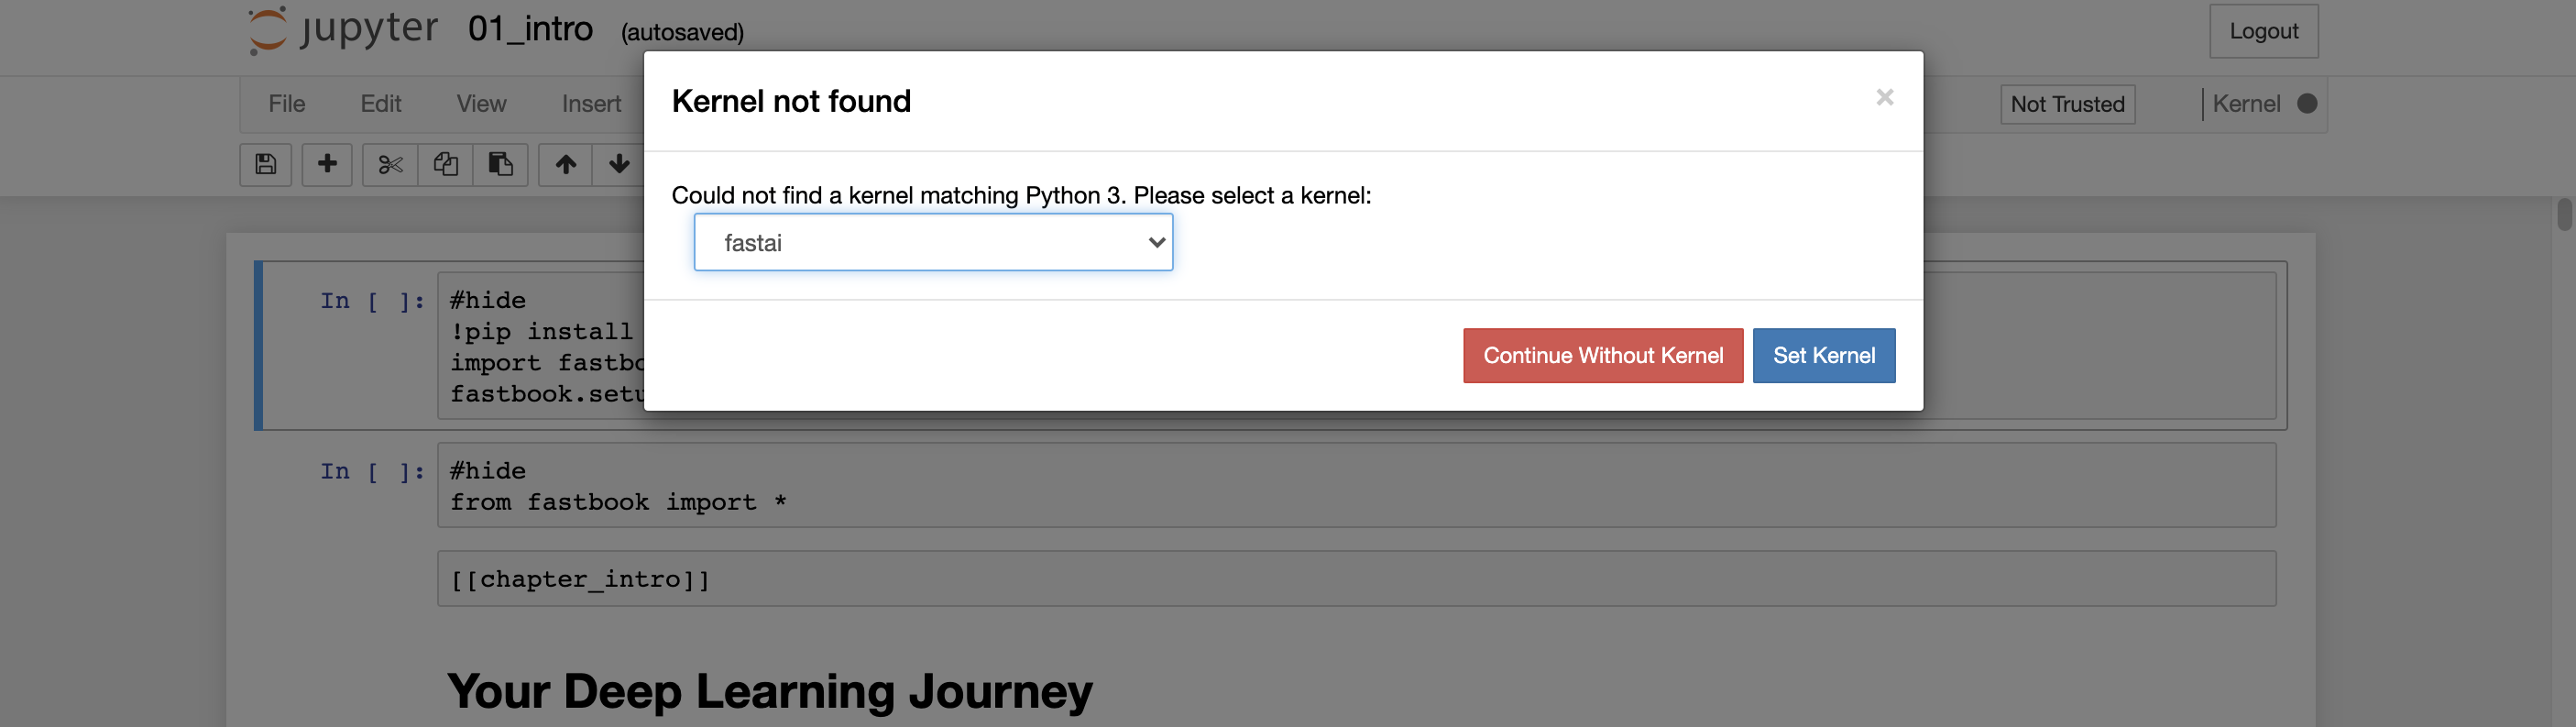
4 - When you open your first notebook, you'll be asked to select a kernel. Make sure to choose the 'fastai' kernel. If that isn't an option, give it 20 minutes as your instance will need a bit of time to setup the first time it is opened. If it still doesn't appear as a kernel option then you might need to use the following YAML file that a very kind person on that forums has created (I had to do this and then repeat step 2 in the 3.3 'Stack Setup' section):
https://forums.fast.ai/t/sagemaker-notebook-deployment-problem-no-fastai-kernel/88806/10?u=chelsea